
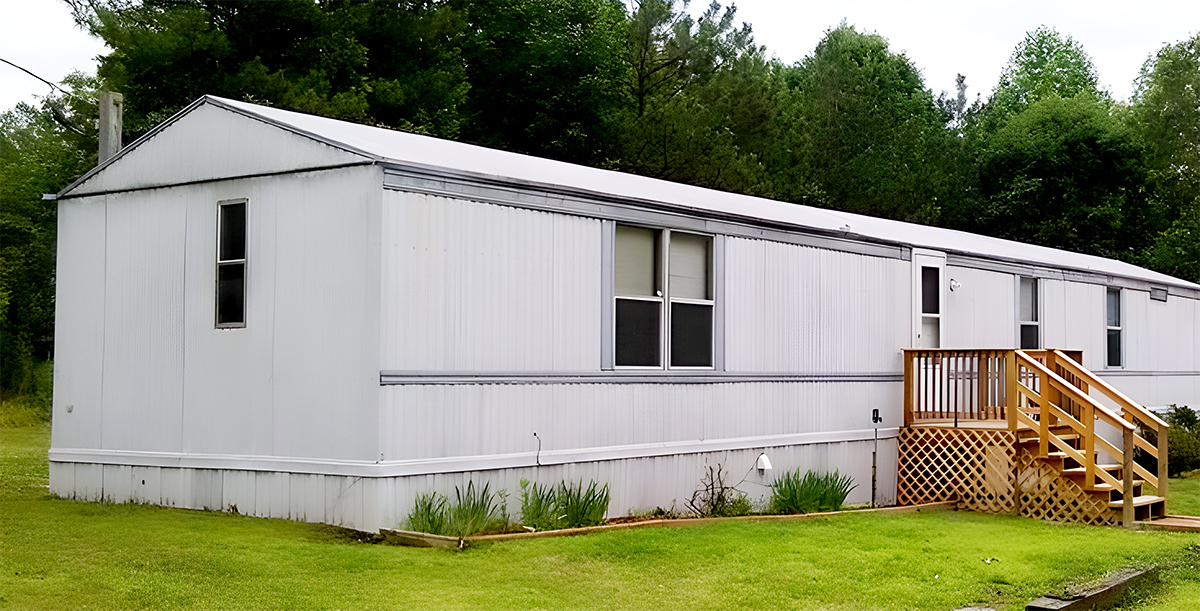
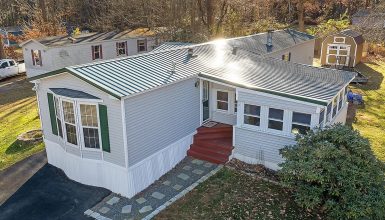
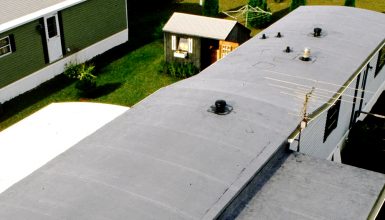
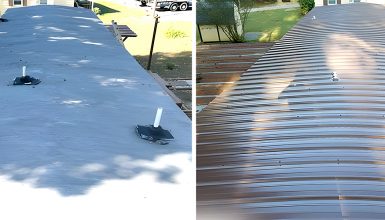
Most mobile homes come factory-fitted with flat or slightly sloped roofs. They’re cost-effective and do the job just fine, but they have drawbacks. Limited life span, the potential for leaks, poor insulation – you get the picture. That’s where the idea of upgrading to a pitched roof comes in. Picture this – a roof with a stylish slope, excellent insulation, a longer life span, and improved home value. Sounds like a dream, right? Well, the good news is it can be your reality. Let’s dive in!
Pre-Installation Considerations
Adding a pitched roof-over to your flat-roof mobile home isn’t like changing light bulbs. It’s a significant renovation. You’ll need to consider things like the structural integrity of your home, local building codes, and of course, the costs.
- Evaluating your mobile home’s structure
First up, take a good look at your mobile home’s current structure. It’s like when you’re cooking – you don’t start whipping up a soufflé without checking if your oven works first, right? Check if the existing roof and walls can support the weight of a new pitched roof. Remember that while your mobile home might be sturdy, it’s not built like a brick house. Don’t be shy about bringing in an expert to assess your home’s structural integrity if unsure.
- Local building codes and regulations
Next on the agenda: building codes and regulations. As much as we’d love to build whatever, wherever, and however, rules are rules. And trust us. You don’t want to skip this step. Check with your local building department about what’s acceptable in your area. It might sound like a chore, but better than undoing your hard work later.
- Hiring professionals vs. DIY
And finally, we’ve got the big question: to hire professionals or to DIY? Both options have their pros and cons. Going the DIY route could save you money; there’s nothing like the satisfaction of doing it yourself. On the other hand, hiring professionals might be more costly, but it can save you a ton of time. And you’ll have the expertise of seasoned pros on your side.
Tools and Materials
Tools and materials are the bread and butter of any DIY project. Without them, we’re like a painter without a palette – all set to create but missing the essentials! Here is what you need:
Tools
Let’s list out the necessary tools you’ll need to install a pitched roof on your flat-roof mobile home:
- Measuring Tape: To get accurate measurements of your roof’s dimensions.
- Chalk Line: For marking straight lines across your roof surface.
- Circular Saw: To cut the sheathing to the correct size.
- Hammer or Nail Gun: To nail down your sheathing, underlayment, and roofing materials.
- Roofing Nails: 1-inch and 1 1/4 to 1 1/2-inch nails are ideal for securing relatively thin asphalt shingles to the roof deck.
- Safety Harness: A must-have for safety reasons when working on a roof.
- Ladder: For access to the roof.
- Drill: For securing the trusses and other structures to your existing roof.
- Pry Bar: Useful for removing any old roofing materials if necessary.
- Utility Knife: To cut underlayment and other materials to the correct size.
- Level: To make sure your installation is perfectly horizontal and vertical.
- Roofing Shovel or Roof Scraper: If you’re removing old roofing material.
- Tin Snips: If you’re working with metal roofing or need to cut flashing or drip edges.
- Caulking Gun: For applying sealant around areas like vents, chimneys, or any place prone to leaks.
Materials
Materials? You bet. We’re talking about trusses, sheathing, underlayment, and roofing material (like shingles, metal, or tiles). Don’t forget the drip edge and flashing. These are all the components that will come together to form your new pitched roof.
1. Trusses
Trusses form the skeleton of your pitched roof and are typically made of wood. The size and design of your trusses will depend on the size of your mobile home and the slope of your new pitched roof. A common type of truss used in mobile home applications is the fink truss, which can span distances of up to 33 feet, perfect for the width of most mobile homes.
2. Sheathing
Sheathing, often made from plywood or oriented strand board (OSB), provides a solid surface for installing roofing materials. The thickness of sheathing typically ranges from 3/8-inch to 1/2-inch for residential roofs. Standard sheets of sheathing are 4 feet by 8 feet. The number of sheets you’ll need will depend on your mobile home’s roof size. But you can estimate this by calculating the total roof area in square feet and dividing by 32 (the square footage of a 4×8 sheet).
3. Underlayment
The underlayment is a protective layer between the sheathing and roofing material. The most commonly used underlayment is #15 felt, which comes in rolls that cover 432 square feet. Another popular option is synthetic underlayment, which often comes in larger rolls covering 1,000 square feet or more. The number of rolls you’ll need will depend on the total area of your roof.
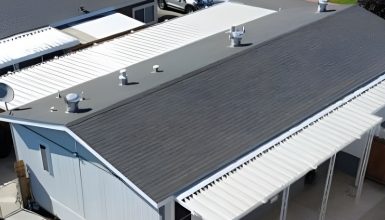
4. Roofing Material
The size of your roofing material will depend on the type you choose. Suppose you’re using asphalt shingles (a popular choice for mobile homes). In that case, they usually come in bundles that cover around 33.3 square feet. For metal roofing, panels are often custom-cut to the length of your roof to minimize seams. They are typically between 2 to 3 feet wide.
5. Drip Edge
A drip edge is a type of metal flashing installed at the roof’s edges to control water flow away from the fascia and protect the underlying roofing components. Drip edges come in various sizes, but a typical size is 2 inches wide by 3 inches long, in 10-foot lengths. The specific size you’ll need will depend on the overhang of your shingles and the angle of your roof’s slope.
6. Flashing
Roof flashing directs water away from critical areas of the top, such as vents, chimneys, or valleys where two roof slopes meet. Flashing comes in rolls or sheets, typically made of metal like galvanized steel or aluminum. Typical sizes for roll flashing range from 6 to 20 inches wide and 10 to 50 feet long. For sheet flashing, dimensions are often 4×4, 8×8, or 12×12 inches, but these can vary depending on the application.
Installing the Pitched Roof: Step-By-Step Guide
Okay, folks! It’s time to roll up those sleeves and jump into action – let’s install that pitched roof! Follow along step by step; your mobile home flat roof will soon be rocking a new look.
Step 1: Measuring and marking the roof area
Grab your trusty tape measure, and let’s get accurate numbers on your roof’s size. You’ll need these measurements to cut your materials correctly. It’s like tailoring a suit – you want that perfect fit!
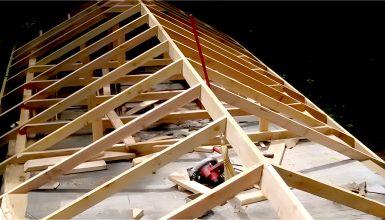
Step 2: Building the truss system
Here’s where things get a bit more hands-on. Trusses are the skeleton of your roof, and we need to assemble them on the ground first. Remember those measurements from step one? That’s where they come in handy.
Step 3: Installing the trusses
Time to bring in some muscle! Carefully lift the trusses onto the roof. It’s heavy, tricky work, but you’ve got this! Remember, safety comes first.
Step 4: Applying the sheathing
The sheathing is like the skin of your roof, providing a surface for your roofing materials to attach to. Lay it across the trusses, nail it down, and voila, your roof is starting to take shape.
Step 5: Adding the underlayment
Underlayment is the unsung hero in roofing. It adds an extra layer of protection against moisture. Think of it as your roof’s secret weapon against rain, snow, and ice.
Step 6: Installing roofing material
Whether it’s shingles, metal, or tiles, this is the step where your roof gets its final look. It’s like applying the topcoat to a manicure – the finishing touch that combines everything.
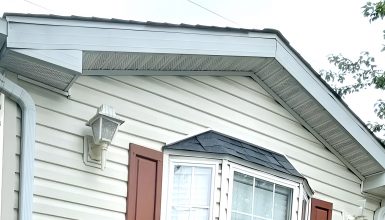
Step 7: Installing roof features
Last but not least, don’t forget about your vents and gutters. These features ensure that your roof isn’t just pretty but functional too. After all, even the most beautiful roof needs to do its job!
Mobile Home Pitched Roof Costs
Let’s talk money, specifically the costs of adding a pitched roof to your mobile home. First, you need to know there isn’t a one-size-fits-all price tag. Just like any other home improvement, the final bill can vary.
So, what’s the first thing that impacts cost? Materials! As mentioned earlier, the most common materials for mobile home roofs are metal and asphalt shingles. Metal roofing can run anywhere from $3 to $9 per square foot. On the other hand, asphalt shingles tend to be a bit easier on the wallet, typically costing $1 to $4 per square foot.
But hang on. The costs don’t stop at the surface. You’ve also got the underlayment, sheathing, trusses, and all the other bits and pieces like nails, flashing, and drip edges. Each of these items adds to the overall material cost.
Now, what if you’re not the DIY type and prefer to leave it to the pros? Well, that’s when labor costs enter the picture. You’re looking at anywhere from $2 to $5 per square foot for labor alone, depending on your location and the complexity of your roof’s design.
Last but not least, remember our chat about building codes and regulations? Make sure to factor in the costs of permits and inspections required by your local authority.
So, all in all, a ballpark figure? Well, for an average-sized mobile home, installing a new pitched roof can range from $4,000 up to $10,000 or more.
Conclusion
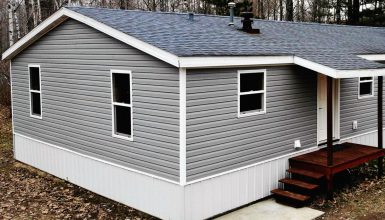
There’s no doubt about it. Adding a pitched roof to your mobile home flat roof can be a game changer. You’re upgrading not just the look but also the functionality, energy efficiency, and potentially the overall value of your sweet home. Sure, it might feel a bit overwhelming when you look at all the steps and materials involved. But remember, every home improvement journey begins with that first step.
