
A leaky bathtub faucet can be a real pain. It’s not just the annoying drips that keep you up at night, but it can also lead to higher water bills and potential damage to your mobile home.
Fixing a leaky faucet is a simple DIY project that can save you a lot of money in the long run. Not only that, but it’s also an excellent opportunity to upgrade your faucet to a newer, more stylish one. The best part? You don’t need to be a plumbing expert to do it! So grab your tools, let’s get started, and say goodbye to that annoying drip!
Causes
There are several common causes of a leaky bathtub faucet in a mobile home, including:
- Over time, the washers and gaskets in the faucet can wear out and cause leaks.
- Valve stems can become rusty over time, causing leaks.
- Loose connections between the pipes and the tap
- If the lines leading to the faucet are damaged, they can cause leaks.
- An old or worn-out faucet can be the cause of a leak.
By addressing these common causes, you can prevent and fix leaks in your bathtub faucet. Regular maintenance and inspections can help you catch any issues early and avoid significant problems.
How to fix a leaking bathtub faucet in a mobile home
Before we dive into fixing that leaky faucet, let’s ensure you have all the necessary tools and materials.
Tools and Materials
Here’s a list of everything you’ll need to get the job done:
- Essential plumbing tools: You’ll need a few basic tools to get the job done, such as a wrench, pliers, and a screwdriver.
- Replacement parts: Make sure to have the correct replacement parts for your faucet. Check the manufacturer’s website or take the old parts to the hardware store to ensure you get the right ones.
- Safety equipment: Safety should always be a priority. Wear gloves and safety glasses to protect your hands and eyes.
Having these tools and materials ready will make the job much smoother and less stressful. So, let’s gather everything up and get ready to tackle this leaky faucet!
Step 1: Shutting off the Water Supply
The first thing we need to do before we start fixing that leaky faucet is to turn off the water supply. It will ensure no water flow while we work, making the job much easier and safer. Here’s how to do it:
- Locate the main water shut-off valve: This valve is typically near your mobile home’s main water line.
- Turn off the water supply: Once you’ve found the main water shut-off valve, turn it clockwise to shut off the water supply. Spinning it as far as possible is essential to ensure the water is completely off.
- Confirm the water supply is off: To confirm that the water supply is off, turn on the faucet and ensure no water is coming out. If water is still coming out, return and ensure you’ve turned off the valve properly.
By turning off the water supply, we can work on the faucet without worrying about water flowing. Let’s move on to the next step and get this leak fixed!
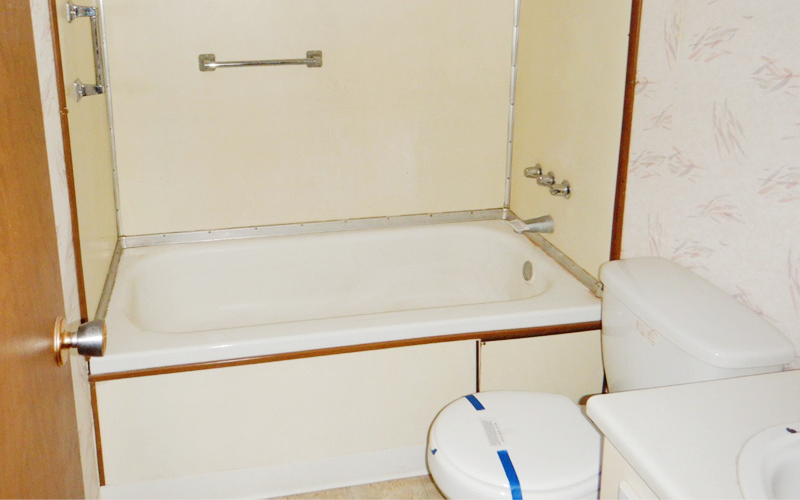
Step 2: Removing the Old Faucet
Now that the water supply is off, it’s time to remove the old faucet. Here’s how to do it:
- Remove the handle: Use a screwdriver to remove the screw that holds the handle in place. Carefully remove the handle and set it aside.
- Access the valve stem: The valve stem controls the flow of water. To access it, you’ll need to remove the cap or cover on the handle.
- Remove the mounting nuts: The mounting nuts hold the faucet in place. Use a wrench to loosen and remove the nuts.
- Carefully remove the old faucet: Once the nuts are removed, you can carefully lift the old faucet out of place. Be careful not to damage the pipes or connections.
Now let’s move on to installing the new faucet.
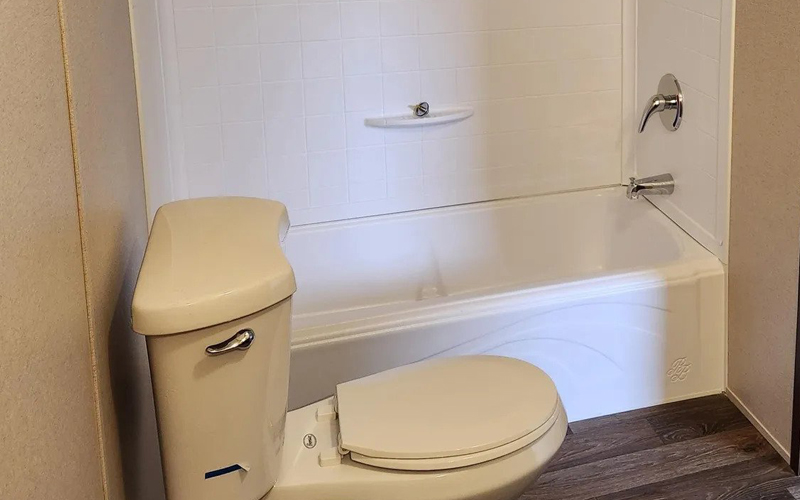
Step 3: Installing the New Faucet
Now that the old faucet is removed, it’s time to install the new one. Here’s how to do it:
- Align the new faucet: Make sure the new faucet is properly aligned with the holes in the sink.
- Install the mounting nuts: Use the wrench to tighten the mounting nuts and secure the new faucet.
- Replace the valve stem: Reinstall the valve stem and ensure it’s secure.
- Reinstall the handle: Put the handle back in place and use the screwdriver to tighten the screw that holds it in place.
Step 4: Testing the New Faucet
By installing the new faucet, you’ve successfully fixed the leak! Good job! Now let’s test the new faucet to ensure it’s working correctly. Here’s how to do it:
- Turn on the water supply: Use the main water shut-off valve to turn the water supply back on.
- Check for leaks: Turn on the faucet and check for any leaks. If there are no leaks, you’re good to go!
- Adjust the water temperature: Ensure the water temperature is set to your liking. If it’s not, use the handle to adjust it.
By testing the new faucet, you’ve confirmed that it’s working correctly and fixed the leak. Congratulations! You did it! Now you can enjoy a peaceful bath without any annoying drips.
Conclusion
Wow, congratulations! You’ve successfully fixed that leaky bathtub faucet and can now enjoy a soothing bath without any annoying drips. By following this guide, you’ve saved time and money by doing the job yourself.
Remember, regular maintenance of your faucet can help prevent future leaks and keep it working correctly. So, check your faucet regularly and address any issues as soon as they arise.


