
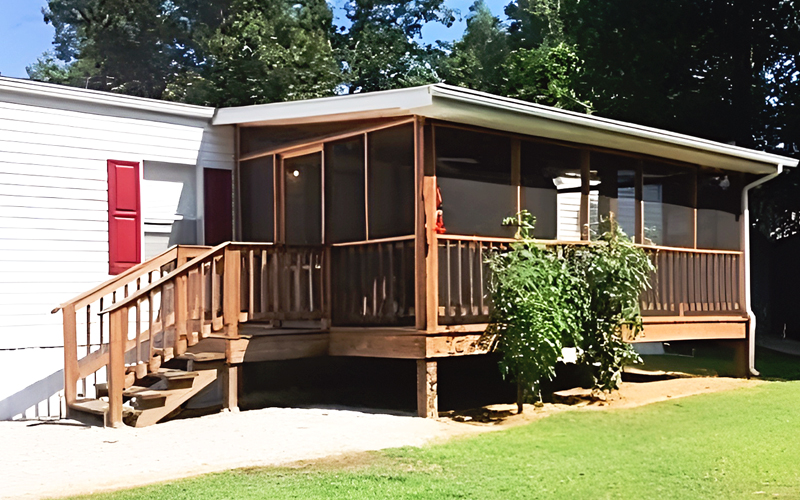
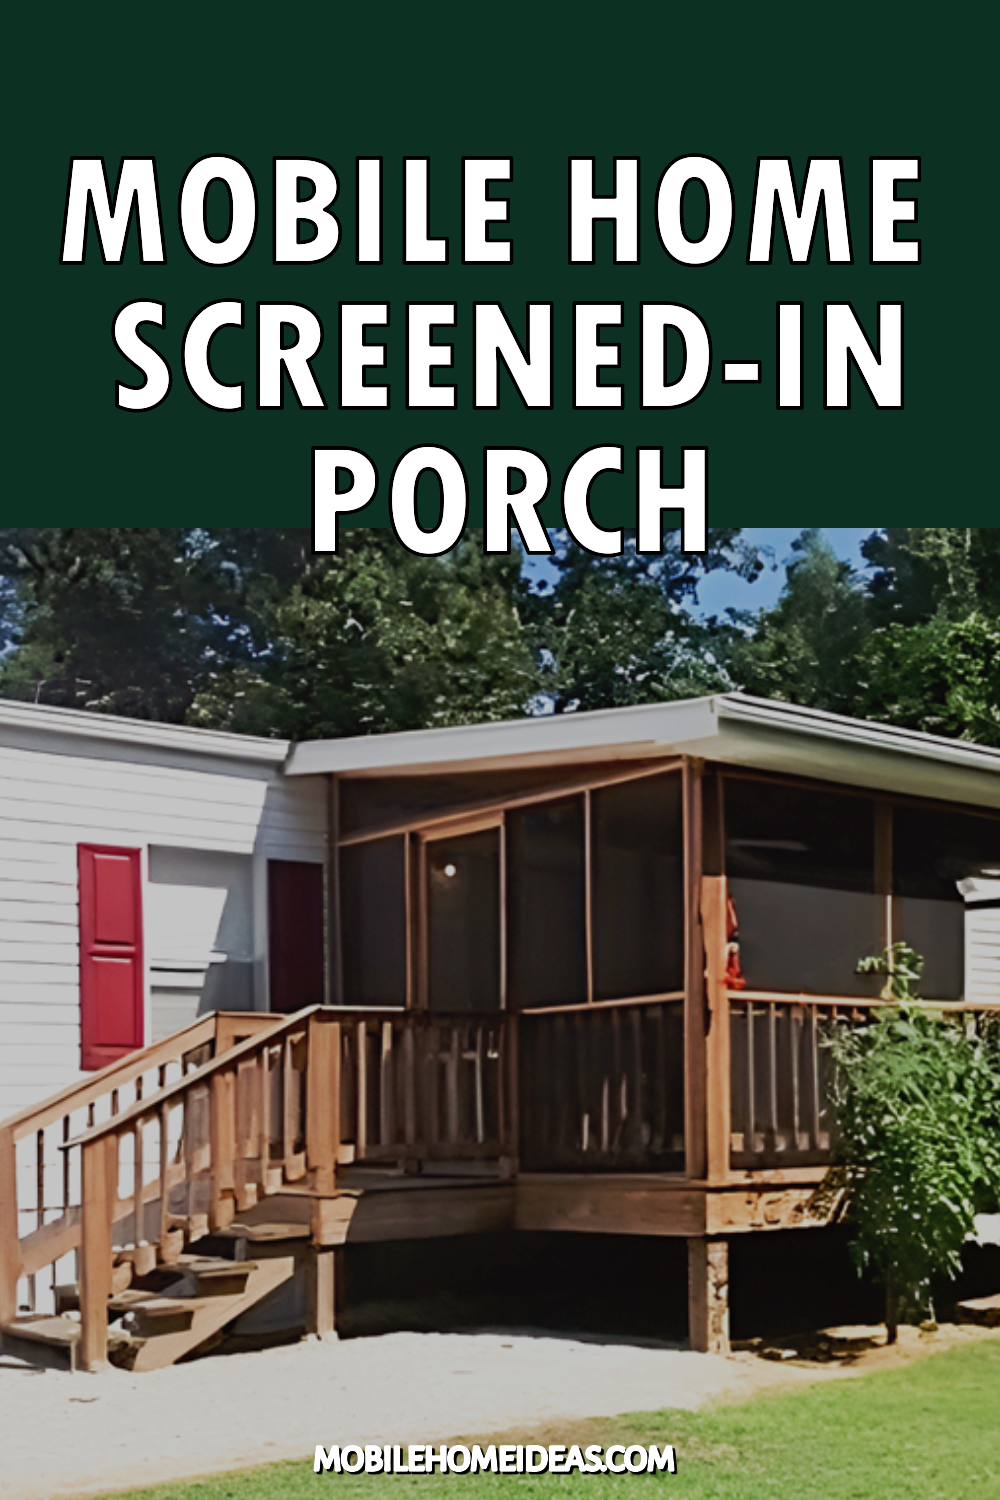
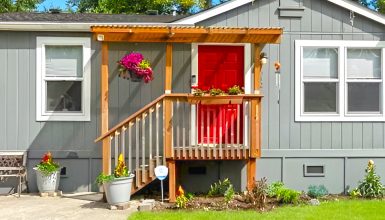
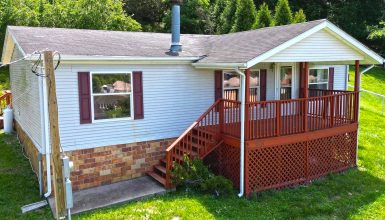
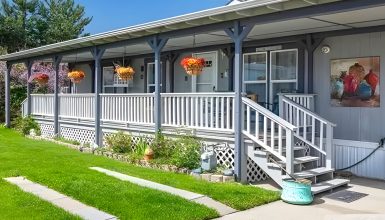
Screened porches are a game-changer for mobile home living. Imagine sipping your morning coffee, listening to birds sing, and breathing in the fresh air without pesky bugs buzzing around. Sounds amazing, right? Well, that’s the magic of a screened porch! Not only does it provide a comfy outdoor space to relax and entertain, but it also adds an extra layer of protection to your home.
In fact, a well-designed screened porch can even boost your mobile home’s value. So, let’s dive into the world of mobile home-screened porches. And discover the secrets to designing, building, and relaxing in your outdoor haven.
Planning and Design
Planning and design are key to creating a screened porch that suits your mobile home and lifestyle. It’s like laying the groundwork for a beautiful, functional space you’ll love for years. So, let’s break down the steps, shall we?
- Home Layout
First, look at your mobile home’s layout and structure. Think about how a screened porch would fit in with the existing design. Sketch a few ideas or snap some photos, and let your creativity flow. Remember, your porch should complement your home, not clash with it.
- Purpose
Next, consider what you want to use your screened porch for. Will it be a quiet retreat for reading? A lively spot for family gatherings? Or maybe a little bit of both? Knowing the purpose helps you choose the right features, like seating, lighting, and plants.
- Location
Now, let’s talk location. Where should your porch go? Ideally, you’ll want to pick a spot that offers privacy, sunlight, and protection from the elements. Don’t forget to consider how the new porch will affect traffic flow and accessibility in and around your mobile home.
- Budget
Budget time! Before you start shopping for materials and hiring contractors, establish a realistic budget. Be sure to include permits, labor, and unexpected expenses. Having a clear budget will help you make smart choices throughout the project.
- Permits
Speaking of permits, checking your local building codes and regulations is crucial. Some areas have specific rules for mobile home additions, and you don’t want any surprises down the line. Reach out to your local building department for guidance.
- Materials
Finally, it’s time to pick your materials. Choose high-quality, weather-resistant options that stand up to the elements and look great for years. From decking to screening, there are plenty of choices out there, so take your time and do your research.
Tool and Materials
To build a mobile home screened porch, you’ll need various tools and materials to ensure a successful project. Here’s a list to help you gather everything you need before getting started:
Tools:
- Tape measure
- Level
- Hammer
- Circular saw, or miter saw
- Jigsaw or reciprocating saw (for cutting curves or notches)
- Cordless drill with drill bits and screwdriver bits
- Carpenter’s square
- Chalk line
- Post hole digger or power auger (for digging footings)
- Wheelbarrow
- Shovel
- Ladder
- Safety gear (gloves, goggles, ear protection)
- Staple gun (for attaching screens)
- Utility knife (for trimming screens)
- Paintbrushes, rollers, and trays (for painting or staining)
Materials:
- Lumber (pressure-treated wood, composite, or other suitable materials) for support posts, beams, joists, decking, roof structures, and screen frames.
- Concrete mix (for footings)
- Metal post anchors and brackets (for attaching support posts to footings)
- Screws, nails, and other fasteners (specific to your chosen materials)
- Screen material (fiberglass, aluminum, or other options)
- Screen spline and spline tool (for installing screens)
- Screen door and hardware
- Optional windows for added ventilation or weather protection
- Roofing materials (shingles, metal roofing, or other options)
- Paint or stain (for finishing wood surfaces)
- Outdoor lighting and electrical components (if desired)
Remember that the specific tools and materials you’ll need may vary depending on your design choices and local building codes.
Step-By-Step Building a Mobile Home Screened Porch
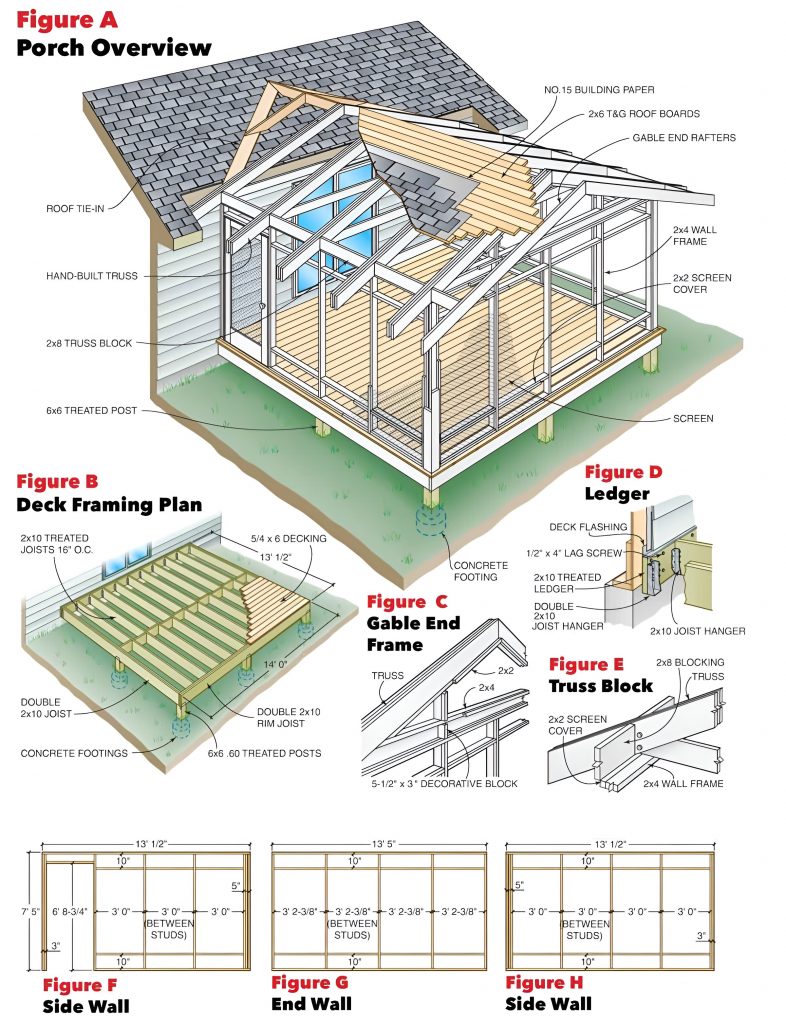
Source: Familyhandyman
Ready to start building your dream screened porch? Exciting! Let’s walk through creating a screened-in porch for your mobile home addition. With these steps, you’ll be well on your way to a stunning and sturdy outdoor space.
Step 1: Preparing the site
Preparing the site for your screened porch is the first crucial step to ensure a successful build. A well-prepared site lays the foundation for a safe, stable, attractive porch. So, let’s dig into the details of what you need to do.
- Mark the area: Start by marking the exact location of your screened porch using stakes and string. It will give you a clear visual of the porch’s size, shape, and placement in your mobile home.
- Clear obstacles: Remove any obstructions from the marked area, such as rocks, tree roots, or debris. You want a clean and obstacle-free zone to make construction as smooth as possible.
- Remove vegetation: Clear grass, plants, or shrubs within the marked area. It helps prevent unwanted growth beneath your porch and ensures proper airflow, which can help prevent moisture-related issues.
- Level the ground: Use a shovel, rake, and tamper to level it within the marked area. A level surface is essential for a stable porch foundation. Check the site with a long straightedge and a level to ensure the ground is even.
- Check for utilities: Before digging any holes for footings, make sure you know the location of any underground utilities, such as water, gas, or electrical lines. Contact your local utility companies or use a utility-locating service to avoid accidentally damaging pipes during excavation.
- Drainage plan: Proper drainage is essential to prevent water from pooling around your screened porch. If necessary, grade the area to encourage water runoff away from the porch and your mobile home.
Step 2: Installing footings and support posts
Footings and support posts are crucial in building a stable and secure screened porch for your mobile home. These elements provide the foundation that bears the weight of the entire structure. So, let’s dive into installing footings and support posts for your porch.
- Determine footing size and depth: The size, depth, and spacing of your footings will depend on your porch design, local building codes, and soil conditions. Generally, these should be spaced no more than 8 feet, at least 12 inches deep, with some areas requiring 24 inches or more depths. Consult with a professional or your local building department to determine the appropriate specifications for your project.
- Mark footing locations: With your porch area marked and cleared, use stakes or spray paint to indicate where you will dig each footing hole. Ensure they’re evenly spaced and match your porch design.
- Dig footing holes: Use a post hole digger or power auger to dig holes for the footings. To provide better stability, these should be slightly wider at the bottom than at the top. Dig to the appropriate depth according to your design and local building codes.
- Prepare concrete mix: Following the manufacturer’s instructions, mix the concrete in a wheelbarrow or a portable mixer. You’ll want the mixture to be a thick, pourable consistency.
- Pour concrete footings: Fill each hole with concrete, ensuring the top of the foot is level with the ground or slightly above to prevent water pooling. Use a trowel to smooth the surface and create a slight slope away from the center.
- Install post anchors: Place a metal post anchor in the center of each footing while the concrete is wet. Use a level to ensure each anchor is plumb and aligned. Allow the concrete to cure according to the manufacturer’s recommendations, usually 24 to 48 hours.
- Cut support posts: Measure and cut your support posts to the desired length, considering the height of the porch floor and any additional height needed for the roof structure.
- Attach support posts: Secure the support posts to the metal anchors in the footings using appropriate fasteners, such as bolts or brackets. Double-check that each post is plumb and level before fully tightening the fasteners.
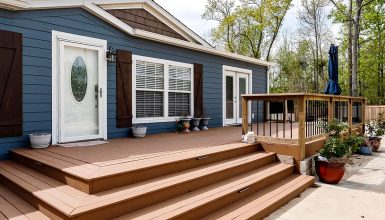
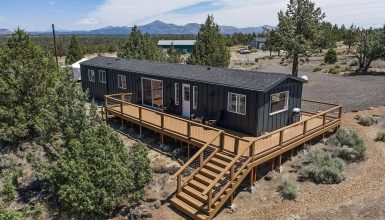
Step 3: Constructing the floor and deck
Constructing the floor and deck is the next step in building your mobile home screened porch. This process involves creating a supportive framework and installing the decking material to create a durable, attractive surface. Here’s how to construct the floor and deck for your porch:
- Install beams: Attach horizontal beams to the support posts, ensuring they are level and secure. Beams provide the primary support for the joists and decking, so it’s essential to use appropriate fasteners and brackets. Depending on your design, beams may be installed either on top of the support posts or to the sides using special brackets.
- Determine joist spacing: Porches’ standard spacing sizes are 12, 16, and 24 inches on-center. Consult your local building codes and recommendations for your decking material. Proper spacing ensures adequate support for the decking and prevents sagging or bouncing.
- Cut and install joists: Measure, cut, and install the joists between the beams, ensuring they are evenly spaced and level. Joist hangers or other specialized brackets may be used to secure them to the beams. For added stability, install blocking or bridging between the joists to prevent them from twisting or moving.
- Lay out the decking boards: Before fastening them, lay them on the joists to ensure a proper fit and plan the desired pattern. Take note of areas that require notching or cutting around support posts or other obstacles.
- Cut and install decking boards: Measure and cut them as needed, ensuring they fit snugly against the support posts or other elements. When attaching the panels to the joists, use appropriate fasteners, such as screws or hidden clips, according to the specifications of the decking material. Be sure to leave a small gap between the boards to allow for expansion and ensure proper drainage.
- Stagger board seams: For a polished look and added strength, stagger the seams of the decking boards by starting each row with a different length of the board. It will create a more visually appealing pattern and distribute the weight evenly across the joists.
- Add a fascia board (optional): For a finished appearance, attach a fascia board around the outer edge of the deck. This board covers the exposed ends of the joists and decking, giving your porch a clean, polished look.
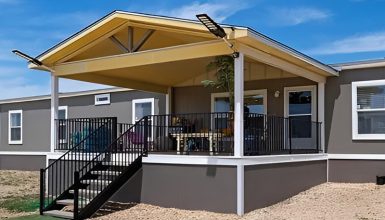
Step 4: Building the roof structure
The roof structure is vital to your mobile home screened porch project. A well-constructed roof provides shelter from the elements and adds visual appeal to your porch. Let’s dive into the details of building the roof structure:
- Choose a roof style: First, decide on a style that complements your mobile home and meets your needs. Common options include gable, shed, and hip roofs. Each type has aesthetic and functional benefits, so consider appearance, drainage, and construction complexity.
- Plan the roof pitch: Determine the pitch, or slope, of your roof based on your chosen style, local building codes, and the roofing materials you plan to use. A proper angle ensures efficient water drainage and helps prevent leaks.
- Cut and install ridge board (for gable and hip roofs): Measure, cut, and install the ridge board, which is the horizontal board that runs along the peak of the roof. The ridge board is where the rafters meet and should be secured to the support posts or house wall.
- Cut and install rafters: Measure, cut, and install the rafters according to your roof style, pitch, and design. Rafters are the sloping structural members supporting roof sheathing and roofing materials. Ensure the rafters are evenly spaced, level, and secure before moving on.
- Add additional framing components: Depending on your roof style, you may need to add other framing elements, such as collar ties, hip rafters, or valley rafters. These components provide additional support and stability to your roof structure.
- Install roof sheathing: Once the rafters and other framing elements are in place, install the roof sheathing. It is typically made of plywood or oriented strand board (OSB) and is the base for roofing materials. Ensure the sheathing is securely fastened to the rafters, and all seams are properly aligned.
- Add roofing materials: With the sheathing in place, install your chosen roofing materials, such as shingles, metal roofing, or other options. Follow the manufacturer’s recommendations for proper installation. Ensuring the materials are securely attached and provide effective weatherproofing.
- Install flashing and trim: To prevent leaks and provide a polished appearance, install flashing at the roof edges, around any vents or openings, and where the roof meets the mobile home wall. Add trim or fascia boards to cover exposed roof edges and create a clean, finished look.
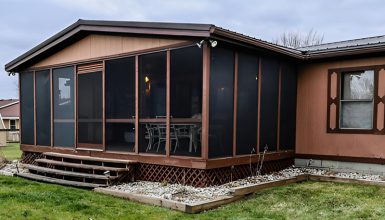
Step 5: Framing the screened porch
Framing the screened porch involves building the walls supporting the screens. Allowing you to enjoy your porch while keeping out insects and debris. Let’s explore the details of framing the screened porch:
- Install vertical studs: Begin by installing vertical studs between the support posts. These studs create the framework for your screens and should be evenly spaced, plumb, and level. Use appropriate fasteners, such as screws or nails, to secure the studs to the support posts and the floor or deck structure.
- Add horizontal cross braces: To provide additional support and stability to the wall framing, install horizontal cross braces between the vertical studs. These braces can be placed at various heights, depending on your design preferences and the size of your screens.
- Install a top and bottom plate: Attach a horizontal board, or top plate, to the top of the vertical studs, connecting them to the roof structure. Similarly, attach a bottom plate to the base of the studs, connecting them to the floor or deck. These plates help to secure the wall framing and create a more rigid structure.
- Frame openings for the screen door and windows (if applicable): If you plan to include a screen door or screened windows, you’ll need to create framed openings for these elements. Measure and cut the framing members to fit, ensuring the spaces are level and square. Secure the framing members to the surrounding studs and plates using appropriate fasteners.
- Double-check for square and level: Before moving on to installing the screens, check that the entire wall framing is square, level, and plumb. It will ensure a proper fit for the screens and prevent door or window operation issues.
Step 6: Installing the screens
Installing the screens is critical to completing your mobile home screened porch. The screens protect from insects and debris while allowing you to enjoy the fresh air and view. Let’s explore the details of installing the screens:
- Measure the openings: Begin by carefully measuring the framed openings between the vertical studs and horizontal cross braces. These measurements will help you determine the size of the screens and the materials needed for installation.
- Choose screen material: Select a screen material that suits your needs and preferences. Options include fiberglass, aluminum, and specialty materials like pet-resistant or solar screens. Consider factors like durability, visibility, and ease of maintenance when choosing.
- Cut screen panels: Using your measurements cut the screen material to fit the framed openings. Ensure extra material is left on all sides to ensure a secure fit and account for minor measurement errors.
- Attach screen to the frame: Depending on your chosen material and design preferences, several methods exist for attaching the screen material to the wall framing. Standard methods include using screen molding, staples, or special clips. Be sure to pull the screen taut as you attach it to the frame to prevent sagging or wrinkles.
- Trim excess screen material: Use a utility knife or scissors to trim any excess material carefully once the screen is securely attached to the frame. Be cautious not to cut too close to the attachment points, which could cause the screen to lose.
- Install screen molding (if applicable): If you’re using screen molding to secure the screens, measure, cut, and attach the molding around the edges of the framed openings, covering the screen edges and attachment points. Use appropriate fasteners, such as finishing nails or screws, to secure the molding to the frame.
- Inspect the installation: After installing the screens, inspect each panel to ensure it is securely attached, taut, and free of any damage. Check for gaps or loose areas that need adjustment or reattaching.
Step 7: Adding doors and windows
Adding doors and windows to your mobile home screened porch enhances its functionality and accessibility. Screen doors allow easy entry and exit, while screened windows provide additional ventilation and light. Here’s how to add doors and windows to your porch:
- Select the right door and windows: Choose a screen door and windows that match the style and dimensions of your porch. Consider factors like durability, ease of installation, and the type of screen material when selecting.
- Prepare the framed openings: Double-check the measurements of your framed openings for the door and windows to ensure a proper fit. If needed, make any adjustments to the framing by adding or repositioning the studs and plates.
- Install the door: Follow the manufacturer’s instructions to install the screen door. It typically involves attaching hinges to the door and frame, then hanging the door in the opening. Be sure to check that the door swings smoothly and latches securely. You may also need to install a door handle and a door closer to control the speed at which the door closes.
- Install the windows: If you’re adding screened windows to your porch, follow the manufacturer’s instructions for installation. Depending on the window style, this may involve attaching the window frame to the wall framing, securing the screens within the frame, and installing any necessary hardware, such as latches or locks.
- Seal gaps and add trim: Inspect the door and window installations for any gaps or spaces that may allow insects or debris to enter your porch. Use weatherstripping, caulk, or other sealants to close any gaps. Additionally, install trim or molding around the door and window frames to create a polished appearance and cover any exposed edges.
- Paint or stain (optional): If you want to match the door and window frames to the rest of your porch, you can paint or stain them to your desired color. Follow the manufacturer’s recommendations for the appropriate paint or stain type and application method.
Step 8: Installing lighting and electrical components
Installing lighting and electrical components in your mobile home’s screened porch will enhance its functionality and ambiance. Allowing you to enjoy your outdoor space well into the evening. Here’s how to install lighting and electrical components on your porch:
- Plan your lighting layout: Before you start, determine where you want to place your lighting fixtures and electrical components, such as switches and outlets. Consider factors like task lighting for specific areas, ambient lighting for general illumination, and accent lighting to highlight features or create a cozy atmosphere.
- Install electrical wiring: With a plan in place, run the necessary electrical wiring from your mobile home to your porch. It typically involves drilling holes through the wall, floor, or support posts to route the wiring and installing junction boxes and conduits as needed. Follow local building codes and safety guidelines when working with electrical wiring.
- Add switches and outlets: Install electrical switches and outlets in the desired locations, following the manufacturer’s instructions and adhering to local building codes. Ensure that any exterior outlets are weatherproof and have ground-fault circuit interrupter (GFCI) protection to prevent electrical shocks.
- Choose and install lighting fixtures: Select lighting for outdoor use and complement your porch’s design. It may include wall sconces, ceiling-mounted fixtures, or even string lights. Follow the manufacturer’s instructions to install the fixtures, connecting them to the appropriate electrical wiring and securing them to the wall or ceiling as needed.
- Install a ceiling fan (optional): If you’d like to add a ceiling fan for additional air circulation and comfort, choose a model rated for outdoor use. Install the fan according to the manufacturer’s instructions, ensuring it is securely mounted to the ceiling and connected to the appropriate electrical wiring.
- Test your lighting and electrical components: Once everything is installed, turn on the power and test your lighting fixtures, switches, outlets, and ceiling fan to ensure they are functioning correctly. If you encounter any issues, consult an electrician for assistance.
If you’re not experienced in electrical work, consult a licensed electrician. It will ensure the electrical layout meets local building codes and safety standards. They can also help you choose the appropriate wiring, switches, and other components for your project.
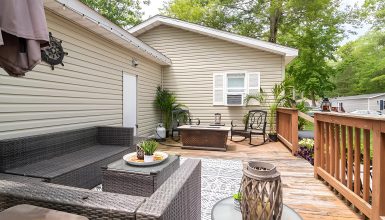
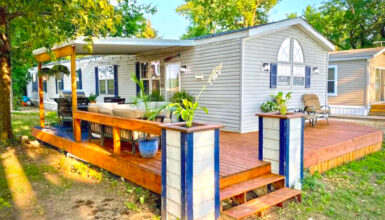
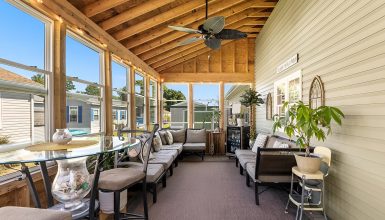
Furnishing and Decorating
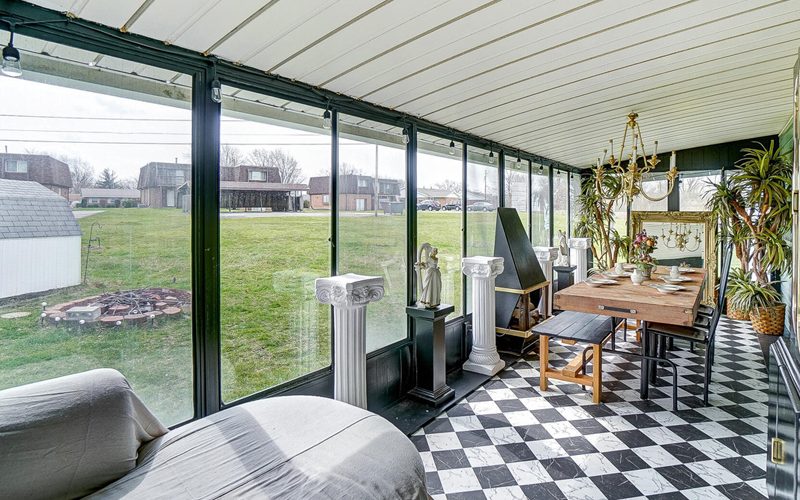
Furnishing and decorating your mobile home screened porch is the final and most exciting step. It is where you get to put your personal touch on your new outdoor space. Transforming it into a cozy retreat or a lively spot for entertaining. Let’s dive into the details of furnishing and decorating your porch:
- Choose a theme
Start by deciding on a theme or color scheme for your porch. It can be anything from a coastal vibe to a rustic retreat or a colorful, eclectic mix. Your theme will guide your furniture and decor choices, creating a cohesive look.
- Pick your furniture
Select furniture that suits your theme, fits your space, and meets your needs. Consider seating (chairs, sofas, or benches) and tables for eating, drinking, or playing games. Look for outdoor-rated, weather-resistant materials to ensure your furniture lasts.
- Add cozy touches
Make your porch more inviting with cushions, pillows, and blankets that match your theme. These soft accents not only add comfort but also bring pops of color and texture to your space.
- Bring in the green
Incorporate plants into your porch design to create a lush, natural atmosphere. Choose a mix of low-maintenance plants that thrive in your climate and light conditions, and place them in decorative pots or hanging baskets.
- Light it up
Enhance your porch’s ambiance with additional lightings, such as string lights, lanterns, or candles. These extra touches create a warm, inviting glow for evening relaxation or gatherings.
- Add personal touches
Decorate your porch with accessories that reflect your personality and style. It can include wall art, decorative signs, or even a collection of unique treasures you’ve picked up during your travels.
- Create functional zones
If you have enough space, consider dividing your porch into different zones for various activities. For example, set up a dining area with a table and chairs, a lounging spot with a sofa or hammock, and a play area with games or toys.
- Keep it organized
Add storage solutions like shelving, cabinets, or benches to keep your porch tidy and clutter-free. This way, you can easily store cushions, blankets, and other outdoor essentials when not in use.
Cost of Building a Mobile Home Screened Porch

The cost of building a mobile home screened porch can vary significantly based on several factors, including the size, materials, design, and location. Here’s a general breakdown of the costs involved in constructing a mobile home screened porch:
- Materials
The cost of materials will depend on your choice of decking, screening, roofing, and framing materials. You can expect to spend between $25 and $50 per square foot on materials, including lumber, screens, fasteners, and other supplies. High-quality or specialized materials, such as composite decking or custom screening, can increase costs.
- Labor
If you’re not building the porch yourself, labor costs can significantly add to the project. Professional contractors typically charge between $50 and $100 per hour. The overall labor cost will depend on the complexity of the project and the time required for completion.
- Permits and inspections
Depending on your local building codes, you may need to obtain permits or schedule inspections for your screened porch project. Permit fees can range from $100 to $500, while inspection fees can vary based on your location and project scope.
- Furnishings and decor
Once your porch is complete, you must budget for furnishings and decor, such as seating, tables, lighting, and accessories. The cost of these items can vary widely, depending on your taste and budget.
- Optional features
Additional features like ceiling fans, skylights, or built-in storage can increase the overall cost of your mobile home screened porch project.
Considering these factors, the total cost of a mobile home screened porch can range from $5,000 to $15,000 or more. Remember that these figures are general estimates, and your specific prices may vary based on your project and location.
Conclusion
And there you have it! Your mobile home screened porch journey has come full circle. From planning and design to building and decorating, you’ve now got all the knowledge and inspiration you need to create the perfect outdoor oasis. It’s time to roll up your sleeves, put your newfound skills to work, and watch your dream porch come to life. Happy porch building!
