
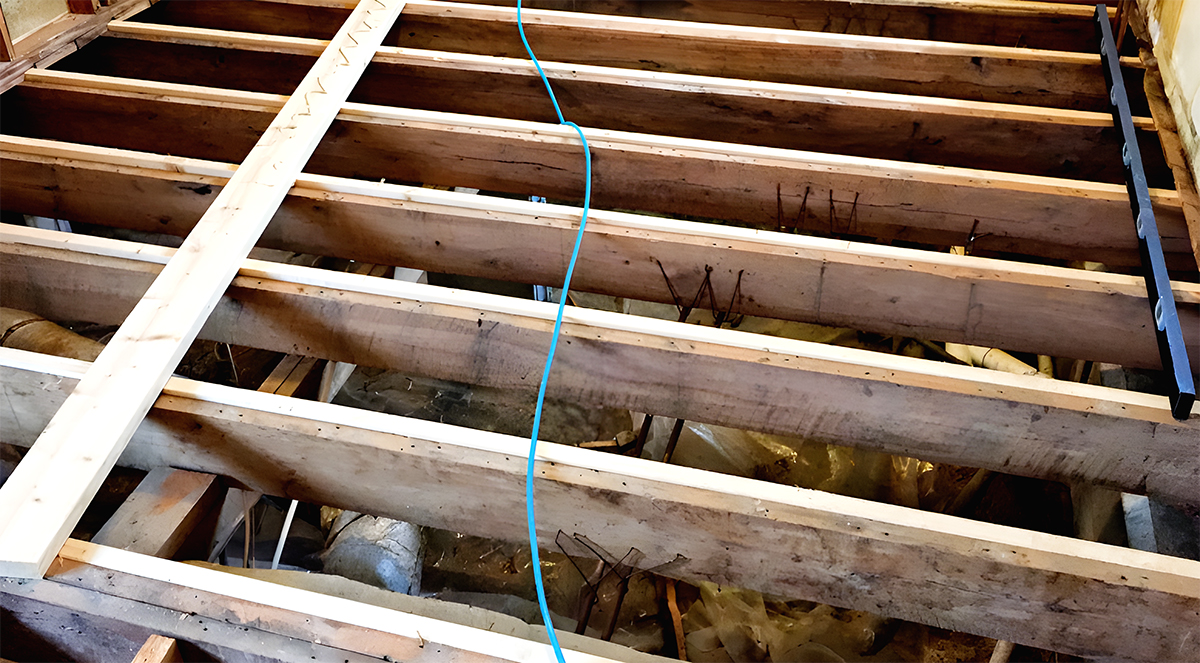
So, what’s a floor joist? Imagine the skeleton of your home. Just as bones give our bodies structure, joists form the ‘skeleton’ for your mobile home’s floor. They run from one side of the bottom frame to the other, usually in a parallel fashion, serving as a support system for your floorboards. Simply put, they’re like the strong, silent bodyguards ensuring your floor doesn’t cave in when you’re chasing your dog around!
The Anatomy of a Mobile Home Floor Joist
Ready to peel back the layers of your mobile home floor? Let’s examine the anatomy of a floor joist step by step. It’s more straightforward than it sounds!
- Dimensions and Spacing
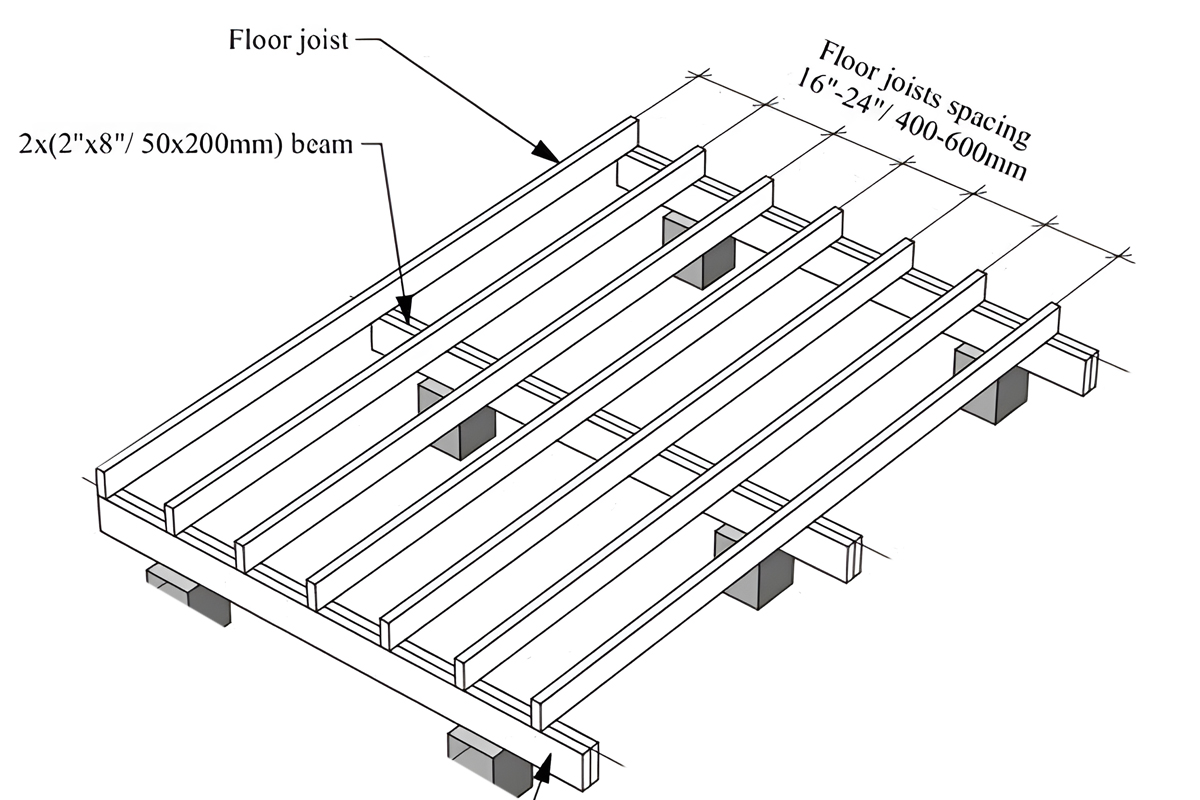
First, let’s talk about dimensions and spacing. Not all floor joists are created equal – their size depends on the design and size of your mobile home. However, most standard joists are 2×6 or 2×8 pieces of lumber. And spacing? Usually, they’re set 16 inches apart. But again, this can vary depending on your mobile home’s design. Remember, this spacing plays a key role in the sturdiness of your floor. Too wide, and you could feel like you’re bouncing around on a trampoline!
- Components of Floor Joists
Next, let’s dissect the components. In the world of floor joists, we have three main players: beams, bridging, and blocking. Beams are the long pieces of lumber that joist rest on, forming the spine of your floor’s structure. Bridging refers to smaller pieces that connect joists, enhancing rigidity and strength. And the blocking? These are chunks of wood inserted between joists to prevent twisting and keep things nice and steady.
- Load-Bearing Capacity
Last but not least, we have load-bearing capacity and stability. Think of your joists as strong arms holding up your home. They bear the weight of everything inside – furniture, appliances, and you and your family. The key is balance. A well-designed joist system distributes this load evenly, preventing your floor from sagging or buckling under pressure.
See? The anatomy of a floor joist isn’t so complex. It’s all about understanding the teamwork between different components, each doing its bit to keep your mobile home stable and secure. It’s like a symphony, where every instrument plays its part to create a harmonious tune. And in this case, that tune is the sturdy, reliable flooring beneath your feet.
Different Types of Floor Joists for Mobile Homes
Let’s venture into the variety of floor joists out there. It’s like a buffet where you choose the best ingredient that suits your needs. Shall we?
1. Solid Lumber Joists
First, we have solid lumber joists. Picture your classic, go-to wood. They’re strong, durable, and, best of all, cost-effective. Lumber joists are tried and tested, standing the test of time in homes worldwide. They’re a favorite for many and can be a great choice if you’re after reliability on a budget.
2. Engineered Wood Joists
Next, step into the world of technology with engineered wood joists. These aren’t your regular pieces of wood. They’re a team of thin layers of wood, all glued together under high pressure. The result? Exceptional strength and a consistent quality that nature sometimes can’t promise. Engineered joists laugh in the face of warping and twisting, keeping your floors as straight as a ruler. They might cost a bit more, but they’re worth it for the long haul.
3. Metal Joists
And then, there’s the odd one out – the metal joists. Less common, but no less mighty. These bad boys are rust-resistant and immune to the whims of insects or rot. They’re also lighter, making them easier to handle during installation. A possible downside is their cost, typically higher than wood. But if you’re aiming for longevity and stability, metal joists might be just the ticket.
So, how do you choose the suitable joist for your mobile home? Think about your needs. If you’re keeping a watch on your budget, lumber joists could be your pick. But, if you’re looking for superior stability and strength, and aren’t shy of spending a little more, consider engineered wood or metal joists.
In the end, it’s like choosing the right pair of shoes. What matters is the fit, comfort, and of course, the style. So, choose based on your budget, needs, and desired durability. After all, your home is a reflection of you!
Installation of Mobile Home Floor Joists
Installing floor joists can be one such project. A bit of planning, some precautions, and voila! You’ve got a sturdy floor under your feet. Let’s break it down, shall we?
Before you even start, some pre-installation considerations are crucial. Measure twice, cut once, as they say. Get the exact dimensions of your mobile home’s floor. It determines the size and number of joists you’ll need. Choose the right material based on your budget and needs. And don’t forget to check local building codes. They might have specific guidelines for joist size and spacing.
Step 1: Gather Your Tools and Materials
Start with gathering all your materials. You’ll need your joists, beams, bridging, and blocking. And don’t forget your tools. Double-check your list for hammers, saws, drills, measuring tape, and pencils for marking.
Step 2: Measure and Mark
Now, measure the area where the joists will go. Remember, accuracy is critical here. Mark the exact spots where your joists will sit on the beams. Check the spacing – it’s usually 16 inches, but refer to your design specs or local building codes.
Step 3: Cut Joists to Size
If your joists aren’t pre-cut, cut them to the correct length. Each one should span the width of your mobile home’s floor. Once cut, lay them out according to your markings.
Step 4: Install Joists onto Beams
One by one, position your joists onto the beams. They should fit snugly and be parallel to each other. Nail or screw them into place for stability.
Step 5: Add Bridging
Bridging time! These smaller pieces connect the joists, adding rigidity. Install them at roughly the middle point of your joists. It’s like adding a belt for extra support!
Step 6: Place the Blocking
Finally, insert the blocking. These chunks of wood go between your joists to prevent any twisting. Think of them as bookends, keeping everything neat and aligned.
Step 7: Double-check Everything
Take a moment to go over your work. Is everything straight and secure? Then pat yourself on the back. You’ve just installed your mobile home floor joists!
Maintenance of Mobile Home Floor Joists
You wouldn’t drive a car without regular oil changes, would you? The same concept applies to your mobile home floor joists. They need a little TLC to keep them in top shape. Here’s your guide to maintaining and troubleshooting those hard-working joists.
1. Regular Inspection
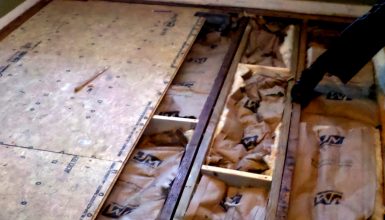
Like a yearly doctor check-up, your joists also need regular inspection. Make a habit of checking them at least once a year. Look for signs of damage, wear, or sagging. Think of it as a meet-and-greet with your home’s underbelly!
2. Identifying Problems
What are you looking for during these inspections? Signs of rot or mold, for starters. They could be in the form of discoloration or a musty smell. Also, look for insect damage – termites and beetles aren’t just annoying. They can be homewreckers!
3. Repairing Damaged Joists
Discovered a problem? Don’t panic. You can fix many issues. For instance, a sagging joist might need reinforcing with a new piece of lumber. If there’s rot, you can remove and replace the affected area. The key is to catch these issues early.
4. When to Replace Joists
Sometimes, repair just won’t cut it. If a joist is severely damaged, or if you notice multiple joists are sagging, it might be time for a replacement. Think of it as a home makeover. It’s a bigger job, but it’s worth it for the safety and longevity of your home.
So there you have it. Caring for your floor joists is about being attentive, proactive, and ready to roll up your sleeves. Remember, a well-maintained floor joist is a happy floor joist. And a comfortable floor joist means a safe and sturdy mobile home.
How to Mobile Home Replace Floor Joists
Replacing floor joists sounds like a mammoth task, right? But don’t fret! You’ve got this with a bit of grit and the proper steps. So, grab your tools, and let’s walk through this process together.
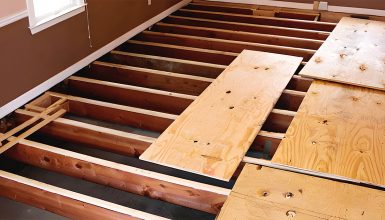
Step 1: Prep Work
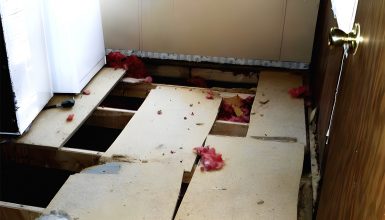
Begin by removing the subfloor over the damaged joist. You’ll need to expose the problematic joist completely. A little messy, but think of it as uncovering hidden treasure.
Step 2: Measure Up
Next, measure the length of the old joist. Your new one needs to be exactly the same length. Got it? Great! Now you’re ready to cut your new joist.
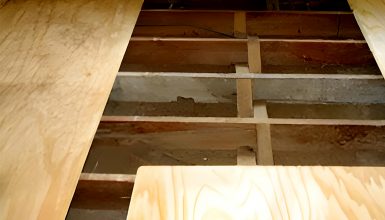
Step 3: Out with the Old
Here comes the challenging part. You’ll need to remove the damaged joist. Be careful, though – you’re dealing with the bones of your home, so treat them gently.
Step 4: In with the New
Now, slide your new joist into the space. It should fit like a glove. If it doesn’t, adjust as necessary. You want a snug fit here, not a forceful shove.
Step 5: Secure the Joist
Now, secure the new joist to the beams. Use the proper fasteners to ensure it’s as stable as a 100-year-old oak tree. We want solid and secure, not shaky and unsteady.
Step 6: Final Check
Lastly, inspect your work. Is everything level and secure? Is the joist parallel with its neighbors? If you’ve ticked all these boxes, then congratulations! You’ve successfully replaced a floor joist.
Conclusion
Navigating the anatomy of your floor joists isn’t as intimidating as it first appears, right? From understanding their critical role to learning how to install, maintain, and even replace them – we’ve tackled it all. Now, you’re equipped with the know-how to ensure the bones of your mobile home are as solid and secure as possible. Whether preparing for a new installation or maintaining your current setup, you have the blueprint for success.


