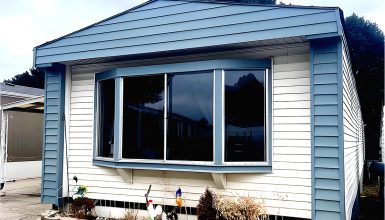
Mobile homes often come with their own unique set of challenges, especially when it comes to insulation. But don’t fret; we’ve got you covered. In this article, we’ll dive into the nuts and bolts of window insulation tailored just for your mobile haven. Not only will this help you combat the cold, but you’ll also save big on those pesky energy bills. So, let’s get started!
Mobile Home Window Basics
First, let’s begin getting to know your windows a little better. Trust us, this will be your golden ticket to a warmer home.
1. Single-Hung Windows
These classics have a stationary top and a bottom that opens vertically. They are ideal for confined spaces and bring any room a neat, tidy look.
2. Double-Hung Windows
Step up your game with double-hung varieties. The top and bottom can move, enhancing airflow and easier cleaning. A true win-win!
3. Slider Windows
For a modern touch, go with slider windows. They glide horizontally, providing a wider view of the great outdoors while maximizing your space. Plus, they’re a breeze to operate.
Now, let’s talk materials. Vinyl is your go-to for budget-friendliness and low maintenance. Meanwhile, aluminum stands tall against harsh weather conditions, bringing durability to the table.
Assess Your Current Window Insulation
Next up, keeping a critical eye on your current setup is crucial. Grab a flashlight and run a steady beam around the window edges. Spot any gaps or cracks? Jot them down. Feel for drafts with your hand — a telltale sign that your insulation isn’t holding up.
Don’t forget to inspect the caulking and weatherstripping, vital players in the insulation game. They should be intact, without any signs of wear and tear.
Lastly, we can’t overlook windows’ pivotal role in energy efficiency. A well-insulated window acts like a barrier, keeping the cold and warm air out ensuring your mobile home stays toasty year-round.
But it’s not just about comfort; it’s about saving green – both the environment and your wallet. Investing in energy-efficient windows means lower energy bills and a smaller carbon footprint, giving you peace of mind as you sip your morning coffee, knowing you’re doing your bit for planet Earth.
The Benefits of Proper Insulation
Let’s discuss the real perks of giving your mobile home windows the insulation they deserve!
1. Lower Energy Bills
First up, who doesn’t love saving money? Proper insulation can significantly reduce your energy bills, sometimes up to 20%! It works like this: good insulation keeps the warm air in during winter and the cool air in during summer. Thus, your heating and cooling systems don’t have to work overtime, keeping those energy bills lower. It’s a win for your wallet!
2. Increased Comfort
Moving on to comfort, it’s all about feeling good in your own space. Insulating your windows ensures that no drafts disturb your perfect indoor temperature. Imagine a chilly winter night wrapped in a warm blanket with no cold drafts sneaking in or a hot summer day with your home staying pleasingly cool. That’s the comfort we are talking about; it’s about creating your perfect haven.
3. Enhancing the Lifespan of Your Windows
Next, let’s talk longevity. Windows are not just holes in the wall; they are investments. You can add years to your windows’ lifespan with the right insulation. Keeping moisture out can lead to wood rot and other damages, so your windows stay pristine and functional for much longer. Not to mention, it saves you from early window replacement costs. It’s a clear case of a little effort now, saving a lot of hassle later.
4. Environmentally Friendly
Lastly, being green is in! Insulating your windows means using less energy to heat and cool your home, reducing your carbon footprint. To give you an idea, for every kilowatt of electricity you save, you prevent the emission of 1.5 pounds of carbon dioxide into the atmosphere. Now multiply that by all the kilowatts you’ll be saving, and that’s a massive thumbs up for our beautiful planet!
Tools and Materials You Will Need
Before we roll up our sleeves and dive into the insulation adventure, let’s ensure we have all the essentials lined up.
Insulating Films
First up on the shopping list are insulating films. These transparent sheets adhere to your window glass, adding an extra insulation layer. They work wonders in reducing heat loss and are a superstar at blocking harmful UV rays. Plus, they give your windows a smooth, glossy finish. It’s style meeting functionality is at its best!
Weatherstripping Materials
Next, it’s time to grab some weatherstripping materials. These come in various types, such as V-strip, door sweeps, or foam tape. Essentially, their job is to seal the gaps around your windows, preventing unwanted air from getting in or out. The result? A home that holds temperature better, keeping you comfortable no matter the season.
Caulking
Onto caulking, your next best friend in this home improvement journey. It’s used to seal the joints and gaps in the stationary parts of your window. Grab a caulking gun and a tube of exterior-grade caulk; go for a color that matches your window frame for a sleek finish. The magic here is blocking those tiny pathways where cold or hot air can sneak in. Say goodbye to drafts and hello to a sealed, secure home.
Tools
Finally, let’s talk about the heroes of the project – the tools. Here’s your checklist:
- Utility knife: For opening packages and trimming materials neatly.
- Measuring tape: To get the precise dimensions of your windows.
- Scissors: You’ll need these to cut the insulating films and weatherstripping materials to the correct size.
- Hairdryer: Yep, a hairdryer! It helps in fitting the insulation film perfectly on the glass.
With this toolkit, you are not just ready but geared to turn your mobile home into a fortress of comfort and efficiency. It’s DIY time; let’s get insulating and watch the transformation unfold with each step!
Step-by-Step Guide to Insulating Your Windows
Ready to get hands-on? Here’s your friendly guide to insulating your mobile home windows step by step!
Step 1: Preparing Your Windows
Before anything else, it’s cleanup time. Grab a bucket of soapy water and a sponge to scrub away dirt and grime from your windows. Next, use wood filler to fix any small cracks or holes in the frames. It’s all about starting with a clean, smooth slate to work on. Now, you’re ready to roll!
Step 2: Installing Weatherstripping
Next up, weatherstripping. Here’s how you do it:
- First, measure the areas you want to seal.
- Cut the weatherstripping materials to the correct length using those measurements.
- SNow, peel off the backing and stick them onto the clean, dry surfaces.
And just like that, you’ve sealed those gaps and upped your insulation game!
Step 3: Applying Insulation Film
Now, it’s film time! Here’s a quick rundown:
- Start by cutting the film to the size of your window, plus a little extra on each side.
- Attach it to the window frame using double-sided tape.
- Use a hair dryer to heat the film, making it tight and wrinkle-free.
Voila! You’ve just added a powerhouse of insulation to your windows!
Step 4: Caulking Gaps and Cracks
On to caulking! Follow these simple steps:
- Ensure the areas to be caulked are clean and dry.
- Using a caulking gun, apply a steady bead of caulk to fill in those gaps and cracks.
- Smooth it out with a caulking tool or your finger for a seamless finish.
And there you have it — a draft-free, cozy living space!
Step 5: The Finishing Touch
Last but not least, let’s add some style with window treatments. Think of thick curtains or honeycomb blinds that add a touch of elegance while keeping the cold out and the warmth in. It’s not just about looks; these treatments add an extra layer of insulation, blending style with practicality.
Maintenance and Care
You’ve done it; your windows are now beautifully insulated! But hold on, our journey doesn’t end here. Let’s chat about keeping things tip-top with some stellar maintenance and care.
1. Regular Checks to Ensure Insulation Efficiency
First on the agenda is scheduling regular checks. Make it a habit to inspect your windows every season. Look for any wear and tear on the weatherstripping and ensure the insulation film is still snug and secure. These checks take just a few minutes but guarantee your insulation works efficiently around the clock. It’s all about staying ahead in the game!
2. Cleaning Tips to Maintain Your Insulation
Now, onto cleaning. Yes, your new insulations need tender love and care to shine!
- Films
A gentle wipe-down with a soft cloth will do the trick for films. No harsh chemicals, please; we want to avoid any damage.
- Weatherstripping
Regarding weatherstripping, a damp cloth with mild detergent works wonders in keeping it clean and effective.
- Caulking
Caulking, too, enjoys a nice cleanup with a simple solution of water and mild soap.
Remember, regular cleaning maintains efficiency and extends the lifespan of your insulation materials.
3. When to Replace Insulation Materials
Finally, let’s talk about replacement. Generally, materials like films and weatherstripping have a good run for about 2 to 3 years. Caulking steps it up with a lifespan of up to five years. When you notice signs of wear and tear, like cracks or loosening, it’s time to refresh and replace.
It might seem like a chore but think of it as renewing your commitment to a cozy, energy-efficient home. Plus, with all your know-how, replacing them will be a breeze!
Conclusion
You’re now armed with all the tools and tips to give your mobile home windows the ultimate insulation makeover! It’s a game changer, trust us. Not only will you be saving big on those energy bills, but you’re also crafting a space that’s warm, welcoming, and utterly you.

