
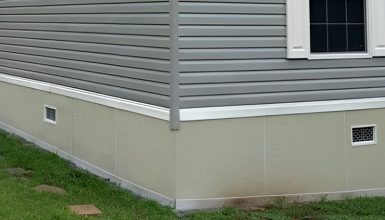
Updating your vinyl skirting is a game-changer. This often-overlooked detail has some serious jobs: think curb appeal and protection from the elements! But before you jump into a snazzy new design, you’ve got to remove the old stuff. Don’t sweat it; we’ve got you covered. This article breaks down the whole process into simple, easy-to-follow steps. So grab your toolkit, and let’s dive in!
Tools Needed
Before removing those vinyl skirting panels, ensure you have the necessary tools and materials to complete the job. After all, being prepared is half the battle, right?
Here’s a list of the tools you’ll need for this project:
- Flathead screwdriver: Perfect for loosening screws or prying off trim pieces.
- Pry bar or putty knife: Ideal for gently prying the panels away from the mobile home without causing damage.
- Work gloves: Safety first! Protect those hands from scrapes and scratches.
- Safety glasses: You never know when debris will fly, so keep your eyes shielded.
Aside from the tools, you’ll also need a clear and organized workspace. Ensure the area around the skirting panels is clean and free of any obstacles or debris. This way, you’ll have room to move around and efficiently complete the task.
So, gather your tools, clear the area, and let’s get ready to remove those vinyl skirting panels like a pro!
Preparing for the Removal
Now that your tools and workspace are ready to go, it’s time to prep your mobile home for the big panel removal.
First, figure out what type of vinyl skirting panels you have installed. Are they interlocking, or do they use a separate rail system? Knowing the specifics will make the removal process a breeze. Let’s dive a bit deeper into the two common types of skirting panel systems:
- Interlocking System
In an interlocking system, the vinyl skirting panels are designed to fit together, connecting one panel to the next. It creates a tight, seamless look and provides added stability. You’ll need to disengage the interlocking edges to remove these panels carefully.
- Separate Rail System
A separate rail system uses individual rails, usually metal or plastic, to secure the vinyl skirting panels. These rails are typically mounted to the mobile home’s frame. And the panels are inserted into the rails, holding them securely. You’ll need to loosen or remove the screws holding the rails to remove the panels from this system.
Step-by-Step Guide to Vinyl Skirting Panel Removal
Now, you’re geared up and ready to roll. Let’s dive into the step-by-step guide, shall we?
Step 1: Inspect the Skirting
So, you’ve got your flashlight. Why the flashlight, you ask? Well, sometimes skirting hides issues in shadows or tucked-away corners. The flashlight will be your secret weapon to spot these hidden flaws.
Start at one end and work your way around. Shine that light close to the skirting surface. What are you looking for? Let’s break it down:
Small cracks can grow into big problems. They let in moisture and pests, so they’re a no-go. Mark them with a piece of chalk for reference.
Warping happens over time due to heat and moisture. Warped panels don’t just look bad; they compromise the skirting’s protective features. So, make a note of any warps you find.
Loose screws or fasteners spell trouble. They can cause panels to sag or come off ultimately. Give them a little shake to check for stability. If they’re loose, you’ll know it.
Discoloration or stains could be signs of water damage or mold. Not what you want hiding under your home! Mark these spots, too.
Sometimes, you’ll find things like leaves, twigs, or small nests lodged in or around the skirting. This debris can trap moisture, so it needs to go.
Why is this detailed check crucial? Knowing the condition of your existing skirting helps you decide whether to repair or replace it. Plus, it’ll give you a heads-up on any other issues you might need to tackle.
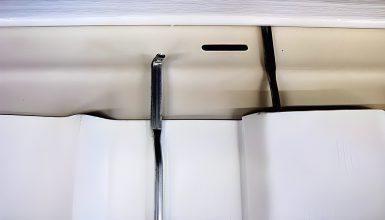
Step 2: Locate Fasteners
Now, let’s focus on the edges of your skirting panels. The fasteners, which could be screws or clips, are usually there. They’re what’s holding your skirting panels securely in place.
If you find screws, they’ll likely be evenly spaced along the edges. Sometimes, they’ll be slightly recessed, so you’ll need that flashlight to catch the glint of metal.
Clips are a bit easier to spot. Clips often have a part that juts out, making them more visible. They might even have a different color than the panel, like silver against white.
Occasionally, you might come across different types of fasteners like staples or nails. Don’t be surprised; older homes especially may have unique setups.
Pay attention to any areas that may have more fasteners than others. This could be a sign that the panel was extra loose or that a repair was made.
Take your time to note where each fastener is. Some people like to use chalk to mark each spot. This makes the next steps a breeze, trust me.
The purpose here? Knowing what types of fasteners you’re dealing with helps you prepare for removal. For instance, screws require a screwdriver, while clips might need just a tug or pry.
Step 3: Removing the Fasteners
First things first, grab that screwdriver or wrench from your toolkit. The type of tool you’ll need depends on what you found during your fastener reconnaissance. If it’s screwed, go for the screwdriver. Clips or bolts? A wrench is your go-to.
If you’re dealing with screws, insert the screwdriver firmly. Apply steady pressure and turn counterclockwise. Do it slowly. Rushing can strip the screw, and you’re in for a real headache.
Do bolts or clips? Position your wrench around them. Again, turn counterclockwise. A little force may be required, but don’t go Hulk on it. Overdoing it can warp the metal.
Pay attention to how each fastener loosens. If one feels stuck, don’t force it. Spritz a little WD-40 or similar lubricant and wait a minute. Patience is key; it helps avoid further damage to the panels or fasteners.
Sometimes, it’s easier to partially loosen all fasteners before completely removing them. This can make the panel easier to handle.
As you remove the fasteners, occasionally give the panel a gentle shake. You’ll feel it loosen, so you’re on the right track!
Try to start at the top and work your way down. Gravity can help you here. It makes the process smoother, especially when you’re about to remove the panel.
So, in a nutshell, go slow and steady. The last thing you want is to damage the panel or cause injury. You’ve got all the know-how you need for this step.
Step 4: Loosening the Skirting
It is your runway for a smooth lift-off in the next step. And guess what? It’s pry bar time!
Not all pry bars are created equal. Make sure you pick one that’s the right size for the job. Too big, and you could damage the frame. Too small, and you’re in for a struggle.
Slide the flat end of the pry bar between the skirting and the frame. Don’t jam it in there; you don’t want to bend or break anything.
Once the pry bar is in place, gently wiggle it to loosen the panel. This is finesse, not a powerlifting competition. Easy does it.
Feel any resistance while wiggling? That’s your cue to stop and double-check for any fasteners you might have missed. Remove those first, then proceed.
After a bit of wiggling, use your other hand to pull on the panel gently. Feel it giving? You’re golden. If not, a bit of pry bar action should do the trick.
Sometimes, it helps to loosen the skirting at multiple points along its edge. This way, you distribute the loosening force, making the next step even easier.
By now, that panel should be noticeably looser and ready for removal. You’ve warmed it up; it’s primed for the taking. Ready to rock and roll into the next step? You’re nailing this, so let’s keep going!
Step 5: Removing the Skirting Panel
This step is where you start to see progress. It is where your prep work pays off, big time.
Always use both hands for lifting. Why? Skirting panels can be heavier than they look. Plus, you get better control and less chance of a fumble.
Give the panel a gentle tug once you’ve got a good grip. If it resists, stop! Check if any fasteners are still in place or something else is causing the hold-up.
Often, skirting panels fit into grooves or channels at the top and bottom. If so, you might need to angle the board slightly to lift it out smoothly. Think about sliding it upwards at a diagonal.
Whatever you do, don’t yank the panel off. You don’t want to damage the frame or, heaven forbid, the panel. Remember, some types of vinyl skirting can crack easily.
Before lifting, ensure a clear, flat area to set the panel down. This isn’t a juggling act; you’ll need both hands free for the next one.
Once the panel is off, carry it to your pre-designated ‘landing zone.’ Stack it neatly. If you’ve got multiple panels, keep stacking them in the same orientation. This helps later if you plan to reuse or recycle them.
Each time you remove a panel, giving it a quick look-over is a good idea. Any surprises like unexpected damage or, let’s say, a hidden wasp nest are better found sooner rather than later.
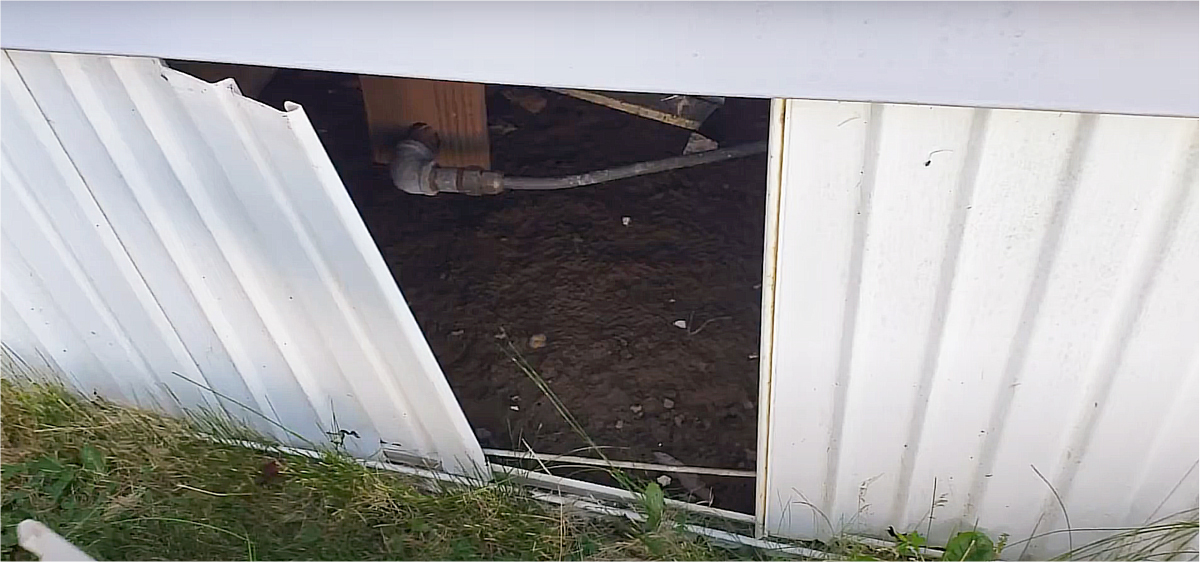
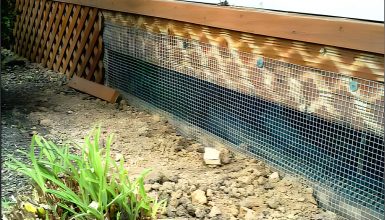
Step 6: Inspecting the Exposed Area
Inspecting the area is one you don’t want to breeze past. It’s your window into the hidden world behind that skirting and the things you might find!
Look for signs of ants, termites, or even small rodents. Little tunnels in the dirt or chew marks are big red flags. Spot something? Time to call pest control.
Puddles or wet soil can point to drainage issues or leaks. You’ll want to address this ASAP to avoid more significant problems like mold or structural damage.
While you’re back there, check any insulation you can see. Sagging or wet insulation needs replacing. Healthy insulation saves you money in the long run.
See any exposed wiring or plumbing? Now’s the time to make sure it’s all in good shape. Frayed wires or rusty pipes are a call to action.
Keep an eye out for cracks in the foundation or any warped wood. Structural issues can escalate quickly and are best dealt with immediately.
Old leaves, trash, or other junk? Get it out of there. It’s not just messy; it can also be a fire hazard.
Take a good sniff. Smell anything musty or foul? It could be a sign of mold or rot. You’ll need to investigate further.
Why is this step so crucial? Well, think of it like a home inspection but for the exterior of your mobile home. The more you know about what’s going on behind those panels, the better you can plan for repairs, replacements, or other maintenance.
Step 7: Cleaning the Area
If you think this step is just about tidying up, think again. A clean workspace is your secret weapon for a smooth reinstall or repair job.
Grab a sturdy broom and a dustpan, maybe even a small hand brush for tight spots. Trust me, the right tools make all the difference here.
Use your broom to remove leaves, soil, and other loose debris. Focus first on the area directly where the panel was. You’ll thank yourself later when you’re not fighting to fit a new board over a rogue rock or twig.
Sometimes, old fasteners, nails, or screws are left behind. Make sure to pick these up; they’re hazards in disguise.
Use your hand brush for corners and tight spaces where the broom can’t reach. It’s like dental care but for your mobile home’s foundation.
Consider a quick wipe-down with a wet rag if the area is grimy. Be cautious if there are exposed electrical elements.
All that stuff you just swept up? Don’t just leave it. Collect it in a trash bag or bin. Keep your workspace neat; it helps maintain focus and efficiency.
With the area clean, it’s a great time for a final safety check. Are any tripping hazards or sharp objects still lurking around? Out they go.
Have you got a leaf blower? This is its time to shine. A quick blast can remove even the most stubborn bits of debris.
Cleaning isn’t just about appearances; it sets the stage for whatever comes next, whether repairs, painting, or new skirting.
Step 8: Prepping for New Skirting
This is the blueprint stage, where accuracy is your best friend. Let’s dig into it!
First up, grab that measuring tape and a pencil. Yep, an excellent ol’ pencil because you might need to erase and adjust.
Don’t hop around. Start at one end of the exposed area and work your way down. Consistency is key here.
The age-old adage “measure twice, cut once” couldn’t be more accurate. Take your time and double-check those numbers.
Once you’ve got that magic number, make a small pencil mark on the frame or ground where the edge of the new panel will sit. These are your guideposts.
If you’ve got a level, now’s a great time to use it. A perfectly horizontal mark ensures that your new panel won’t be crooked.
If you’re installing multiple panels, factor in any gaps or overlaps. Mark those, too. It’s all about that snug fit.
Don’t forget to consider the height. Ensure your new panels will adequately cover the area from top to bottom.
Have you got a tricky corner or an obstruction like a pipe? Make a separate, clearly marked note for any adjustments you’ll need to make.
Before you move on, step back and review your marks. Look okay? Great. Something seems off? Now’s the time to fix it.
Good measurements aren’t just numbers; they’re the DNA of your new skirting installation. Get them right, and everything that follows is a walk in the park.
Conclusion
By now, you’ve mastered the art of vinyl skirting panel removal. You’ve gone from safety prep to disposal like a pro. Next up? Installing the new skirting!


