
You are looking up to find a brownish stain slowly forming on your pristine white ceiling. Or even worse, a bloated, sagging spot that seems to groan under the weight of water. Yep, water damage on your ceiling is no walk in the park. But fear not because we’re here to navigate these murky waters together. Ready to dive in?

Causes
Water damage on ceilings typically comes from leaky roofs. Maybe you’ve got a roof that’s seen better days, and a rainstorm sends water trickling down.
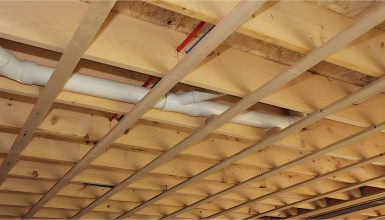
And let’s not forget the hidden culprits – pipes, and condensation. Have a leaky pipe nestled between your ceiling and the above floor? That’s water damage waiting to happen. And condensation? When warm air hits a cold ceiling, it can leave behind moisture, perfect for water damage to set in.
Signs
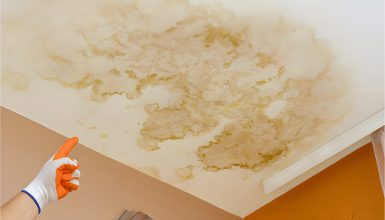
Water stains are the most obvious sign – like a giant arrow pointing to the problem. They can be small initially but usually grow over time, turning from a light yellow to a dark brown.
But there’s more to water damage than just stains. Your ceiling plaster might start to bubble or peel, or even worse, begin to crumble away. In more severe cases, your ceiling could sag, the plaster swollen with water.
And don’t forget the drip-drip-drip. If you see water dripping from your ceiling, that’s a sure sign that water damage has set in.
How to Fix Water-Damaged Ceiling

Let’s wear our DIY hats and gear up to tackle water damage on your mobile home ceiling. You’ve spotted the enemy. Now it’s time to show it who’s boss. So, roll up your sleeves, grab your tools, and let’s get down to business.
Tools:
- Safety Gear
- Utility Knife
- Ladder
- Drywall Saw
- Drywall Screws
- Screwdriver or Drill
- Joint Compound
- Drywall Tape
- Taping Knife
- Sanding Block or Sandpaper
- Stain-blocking Primer
- Paint Roller or Brush
- Fan or Dehumidifier
Materials:
- Drywall or Ceiling Panels
- Paint
Step-by-step
Water damage might seem like a daunting problem, but with these steps, you can turn your water-stained ceiling into a thing of beauty.
Step 1: Identify the Source
Before you start any repair work, finding where the water is coming from is essential. Is it a leaky roof? A sweating pipe? Or is it that pesky condensation? Once you’ve identified the source, fix it. There’s no point repairing a water-damaged ceiling if the water will come right back.
Step 2: Assess the Damage
Next, evaluate how much damage the water has done. If it’s just a stain, you’re in luck. But if the ceiling is sagging or the plaster is crumbling, you’ve got a bigger job ahead.
Step 3: Safety First
Remember to wear your safety gear before you start your repair work. Goggles, gloves, and a mask are good, especially if you’re dealing with mold or crumbling plaster.
Step 4: Remove Damaged Material
Using a utility knife, carefully cut out the damaged part of the ceiling. Be careful not to cut into any pipes or wires that might be hiding up there.
Step 5: Dry it Out
Use a fan or a dehumidifier to dry out the area thoroughly. Any lingering moisture could lead to more water damage or mold growth.
Step 6: Patch and Repair
Now it’s time to patch up the hole. Cut a piece of drywall to fit the size of the hole. Screw it into place, and then apply a joint compound around the edges. Once it’s dry, sand it smooth.
Step 7: Prime and Paint
After repairing the hole, it’s time to paint. But first, apply a stain-blocking primer to prevent any water stains from showing through. Once the primer is dry, paint over the area to match the rest of your ceiling.
Costs
What does it cost to repair a water-damaged ceiling in a mobile home? Well, it’s not as simple as pulling a number from a hat. The cost can depend on a variety of factors.
Let’s start with the extent of the damage. If you’re dealing with a simple stain, you might be able to get away with some stain-blocking paint. But you’re likely looking at a larger bill if we talk sagging, crumbling plaster. Think of it like going from a quick trim to a full-blown haircut and color.
Then there’s the cause of the water damage. Fixing a leaky roof or a busted pipe can add to your costs. It’s like finding out your car needs a new tire and battery. Double whammy!
And don’t forget about the size of the affected area. The larger the site, the higher the cost. It’s like buying fabric – the more you need, the more you pay.
Finally, will you tackle the job yourself or call in a pro? If you’re pretty handy, you could save yourself some cash. But if the thought of DIY makes you break out in a cold sweat, hiring a professional could be your best bet.
The bottom line? Repairing a water-damaged ceiling in a mobile home could cost anywhere from $100 for a simple DIY repair to upwards of $1000 if you’re dealing with severe damage or hiring a pro.
Conclusion
Water damage might seem daunting, but with these steps, you can turn your water-stained ceiling into a thing of beauty. So, let’s wave goodbye to water damage and say hello to a fresh, fabulous ceiling!

