
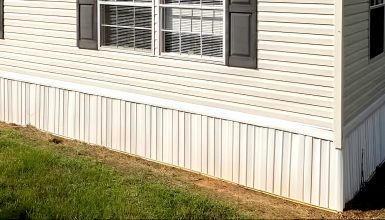
Vents for mobile home skirting play a crucial role in maintaining a healthy, happy home environment. They’re like the unsung heroes of mobile home living. Tirelessly working behind the scenes to keep the air flowing, moisture out, and pesky intruders at bay. So, let’s explore how to choose the vents, install, and maintain them for the ultimate mobile home experience!
Benefits of Mobile Home Skirting Vents
Vent skirting does more than just dress up your mobile home. It keeps your living space comfortable, safe, and efficient. Let’s explore some of the top benefits of vent skirting for mobile homes:
- Improved air circulation
Vent skirting promotes fresh air flow through the crawl space, pushing out stale air and preventing it from becoming trapped. It helps keep your mobile home smelling fresh and clean.
- Temperature regulation
The vent helps maintain a consistent temperature in your mobile home by encouraging airflow. It means less strain on your heating and cooling systems and a more comfortable living environment for you and your family.
- Moisture control
It prevents moisture buildup in the crawl space, which can lead to mold, mildew, and wood rot. By reducing moisture, you’re protecting your mobile home’s structure and creating a healthier living space.
- Pest Prevention
Vented skirting can deter critters like rodents and insects from a residence under your mobile home. Properly installed vents allow airflow while blocking access for unwelcome guests.
- Energy efficiency
With better temperature regulation and moisture control, vent skirting can reduce your mobile home’s energy consumption. It means lower utility bills and a smaller carbon footprint.
- Prolonged structural integrity
By keeping moisture and pests at bay, the vent helps preserve the longevity of your mobile home’s structure. It indicates less maintenance and repair costs down the road.
- Enhanced curb appeal
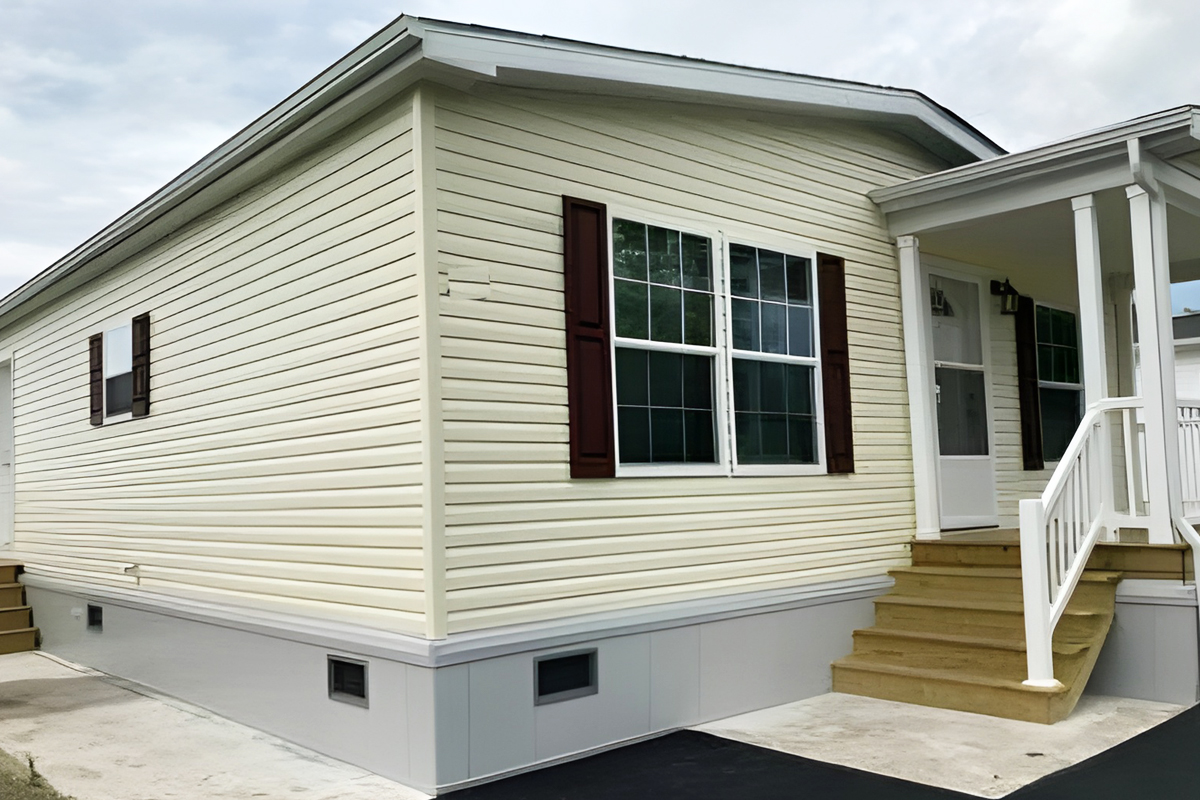
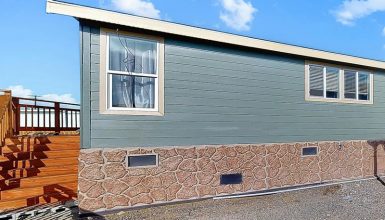
Vent skirting adds a polished, finished look to your mobile home. It can boost your home’s curb appeal and potentially increase its value.
So, yes, vented skirting is a must-have for mobile homes. Not only does it protect your home’s foundation, but it also contributes to a healthy, comfortable, and energy-efficient living space.
Calculating Mobile Home Skirting Vents
The number of vents needed in mobile home skirting depends on the size of your home and local building codes. However, a general rule of thumb to follow is the 1:150 ratio. It means that for every 150 square feet of enclosed crawl space beneath your mobile home, you should have 1 square foot of ventilation.
To determine the number of vents required for your mobile home, follow these steps:
- Measure the length and width of your mobile home.
- Calculate the perimeter by adding the length and width and multiplying by 2.
- Multiply the perimeter by the height of your crawl space to find the total square footage of the enclosed area.
- Divide the total square footage by 150 to determine the required square footage of ventilation.
- Check the size of the vents you plan to use, typically expressed in square inches (e.g., 8″ x 16″ vent = 128 square inches).
- Convert the required square footage of ventilation to square inches by multiplying by 144 (1 square foot = 144 square inches).
- Divide the total required square inches of ventilation by the size of each vent (in square inches) to calculate the number of vents needed.
Remember, local building codes and regulations can vary, so it’s essential to consult with your local building department. It ensures you meet all vent placement and quantity requirements.
How to Install Mobile Home Skirting Vents
Installing mobile home skirting vents is a manageable DIY project for most homeowners. Before you start, make sure you have the right tools and materials. Here’s a step-by-step guide to help you install your skirting vents:
Tools and materials:
- Skirting vents
- Measuring tape
- Pencil or marker
- Carpenter’s square or straight edge
- Drill and drill bits
- Jigsaw or utility knife (depending on the skirting material)
- Screws, nails, or clips (as required for your chosen vent type)
- Safety goggles and gloves
Step 1: Plan the vent placement
Planning the vent placement is essential in installing skirting vents for your mobile home. Properly placed vents ensure optimal air circulation, temperature regulation, and moisture control. Here’s how to plan your vent placement:
Before planning the vent placement, make sure you’ve determined the total square footage of ventilation required for your mobile home. It is based on the 1:150 ratio rule, which means that for every 150 square feet of enclosed crawl space, you should have 1 square foot of ventilation.
Divide the required ventilation footage by the size of the vents you plan to use, typically in square feet (e.g., 8″ x 16″ vent = 1 square foot). It will give you the total number of vents needed for your mobile home.
The vents should be evenly spaced around the perimeter of your mobile home to ensure proper air circulation. Start by dividing the total number of vents by the number of sides your mobile home has (usually four). It will give you the number of vents installed on each side.
Place vents near these spots if you’ve identified problem areas with moisture issues, uneven temperatures, or pest infestations. It will help address the problems and improve the overall living conditions inside your mobile home.
To promote effective air circulation, create cross-ventilation by placing vents on opposite sides of your mobile home. It allows air to flow from one side and pass through the crawl space. And exit from the opposite side, preventing stagnant air and improving overall ventilation.
Always consult your local building department to ensure your vent placement plan complies with all relevant codes and regulations. Different jurisdictions may have specific requirements for vent placement, size, and spacing that you must follow.
Step 2: Measure and mark the vent locations
Accurate measurements and markings ensure the vents are correctly positioned, evenly spaced, and leveled. Here’s how to measure and mark the vent locations:
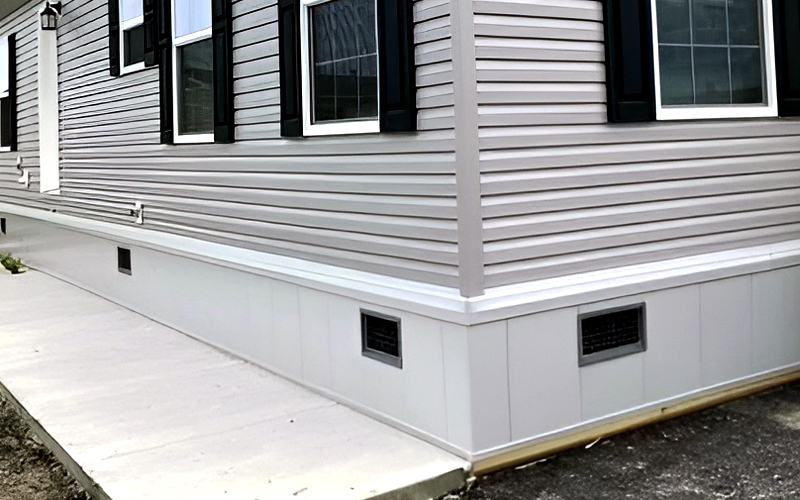
First, decide on the height you want to install the vents. Generally, vents should be placed 3-4 inches above the ground. It prevents water or debris from entering the crawl space while allowing for adequate air circulation.
Starting at one corner of your mobile home, measure along the skirting and mark the center point of the first vent. Follow the spacing plan you created during the vent placement planning phase. Repeat this process for each vent location around your mobile home. Ensuring the vents are evenly spaced and properly positioned.
Draw the line at each marked vent center point using a carpenter’s square or a level. It will help you keep the vents straight and level during installation.
Place the vent over the level line, aligning the center of the vent with the marked center point. Make sure the vent is level and straight. Using a pencil or marker, trace around the vent to mark the cutting area on the skirting. Be precise with your markings, as this will determine the fit and appearance of the installed vents.
Step 3: Cut the skirting for the vents
The next step is cutting the skirting for the vents. It is a crucial step in the installation process, as it creates openings for the vents to fit into. Here’s a how-to cut the skirting for vents:
Before starting any cutting, make sure to put on your safety goggles and gloves. It will protect your eyes from debris and your hands from potential cuts or injuries.
Ensure that the skirting is stable and well-supported before cutting. If possible, remove the section of skirting you need to cut and place it on a stable work surface, like a sawhorse or a workbench. If the skirting is installed, you may need to cut the vent openings.
Use a sharp utility knife to cut along the traced lines for vinyl skirting carefully. Apply steady pressure while cutting, and be cautious not to tear the vinyl. For metal or composite skirting, use a jigsaw with the appropriate blade. Start at one corner of the traced vent opening and carefully follow your marked lines. Keep the jigsaw steady and consistent speed to ensure a clean, precise cut.
Once you’ve cut along all the traced lines, carefully remove the cut-out piece from the skirting. If it’s still attached at some points, use your cutting tool to finish the cuts and free the piece carefully.
After removing the cut-out piece, check the edges of the opening for any rough or jagged spots. If necessary, use a file or sandpaper to smooth out these areas, ensuring a clean and professional-looking vent opening.
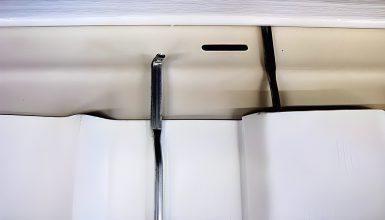
Step 4: Install the skirting vents
Installing the skirting vents is the final and most rewarding step. It is when you’ll see the results of your careful planning, measuring, and cutting. Here’s how to install the skirting vents:
Before securing the vent, place it into the cut-out opening to ensure a snug and accurate fit. Make adjustments before proceeding to the next step if any adjustments are needed.
Some vents require a flange or frame to be installed before the vent. If your chosen vent has a separate flange or frame, follow the manufacturer’s instructions to attach it to the vent or the skirting.
Position the vent in the cut-out opening, ensuring its level, straight, and properly aligned with the edges of the opening. The vent should sit flush against the skirting, with no gaps or protrusions.
Depending on the type of vent and skirting material, you may need to use screws, nails, or clips to secure the vent. Follow the vent manufacturer’s instructions for the appropriate fasteners and installation method.
Pre-drill holes in the vent flange if necessary to prevent cracking or splitting. Drive screws or nails through the flange and into the skirting, ensuring they are evenly spaced and firmly tightened.
Slide the clips onto the edges of the vent flange, following the manufacturer’s instructions. Attach the clips to the skirting, ensuring they are securely fastened and holding the vent in place.
Step 5: Inspect and test the vents
Checking and testing the vents after installation is essential. It ensures they function correctly and provides good ventilation for your mobile home. Here’s the step to inspect and try your newly installed skirting vents:
Walk around your mobile home and visually inspect each installed vent. Check for the following:
- Proper alignment: Ensure the vents are level, straight, and aligned with the skirting.
- Secure fastening: Verify that the vents are securely fastened with no loose screws, nails, or clips.
- Flush fit: Confirm that the vents sit flush against the skirting, with no gaps or protrusions.
Test their functionality for adjustable or automatic vents to ensure they operate as intended.
Open and close the adjustable vents to verify smooth operation and airflow control. Ensure the vents stay in the desired position without slipping or falling out of place.
If you have temperature-sensitive or humidity-controlled vents. Test their automatic functionality by simulating the conditions that trigger their operation. For example, use a hairdryer to apply heat near temperature-sensitive vents. Or a spray bottle to increase the humidity near humidity-controlled vents. Observe the vents to ensure they open and close as intended.
Assess airflow
To evaluate the effectiveness of your new skirting vents, you’ll want to ensure proper airflow through the crawl space. Perform the following checks:
Place your hand near the vents to feel for air movement at the intake and exhaust vents. You should feel the air drawn in through some vents and expelled through others.
Verify that vents on opposite sides of the mobile home promote cross-ventilation, allowing air to flow through the crawl space and preventing stagnant air.
Monitor post-installation
Keep an eye on your mobile home’s crawl space in the days and weeks following the vent installation. Check for signs of improved air quality, temperature regulation, and moisture control. If any issues persist, reevaluate your vent placement or add more vents to improve your mobile home’s ventilation.
Should mobile home skirting vents be open or closed?

Mobile home skirting vents should generally be open to ensure proper air circulation, temperature regulation, and moisture control under your home. However, certain circumstances may be where temporarily closing the vents could be beneficial.
For instance, in frigid climates or during severe winter weather, closing the vents can help prevent the freezing of pipes or cold drafts from entering your home. In this case, monitoring the crawl space conditions closely and reopening the vents once the severe weather has passed is essential. It will prevent moisture buildups and related issues, such as mold or mildew growth.
If you live in an area with temperature fluctuations or seasonal changes. It’s a good idea to consider installing adjustable or automatic vents. These vents can be opened or closed as needed. It gives you better control over the conditions beneath your mobile home. Automatic vents have temperature-sensitive devices that open and close the vents depending on the ambient temperature, ensuring optimal ventilation throughout the year.
Mobile Home Skirting Vent Costs
The cost of installing vents on home skirting can vary depending on several factors. Including the type and number of vents, the material of the skirting, and labor costs if you choose to hire a professional. Here’s a rough breakdown of potential costs:
- Vent cost
Vents for mobile home skirting can range from $5 to $25 per vent, depending on the type, material, and design. Basic vents are usually more affordable, while adjustable, automatic, or decorative vents may cost more.
- Number of vents
The total cost will depend on how many vents you need to install. The number of vents required will vary based on your mobile home’s size, the local climate, and the desired level of ventilation.
- Skirting material
The material of your mobile home skirting can also affect the cost. Some materials, like vinyl, are easier to cut and install vents into. While others, like metal or composite materials, may require specialized tools and more labor, increasing the overall cost.
- Labor costs
Suppose you decide to hire a professional to install the vents. In that case, labor costs can range from $50 to $100 per hour, depending on your location and the complexity of the installation. Installing vents yourself can save labor costs, but ensure you’re comfortable with the process and have the necessary tools.
In summary, installing vents for your mobile home skirting can range from a few hundred dollars for a DIY project. And over a thousand dollars if you choose high-end vents and hire a professional.

Conclusion
We’ve explored the ins and outs of vent skirting for mobile homes, from understanding its importance to installing it properly. By now, you should clearly understand the many benefits vent skirting offers. With the proper vent skirting, you can enjoy a comfortable, efficient, healthy living environment for years. Thank you for reading!


