
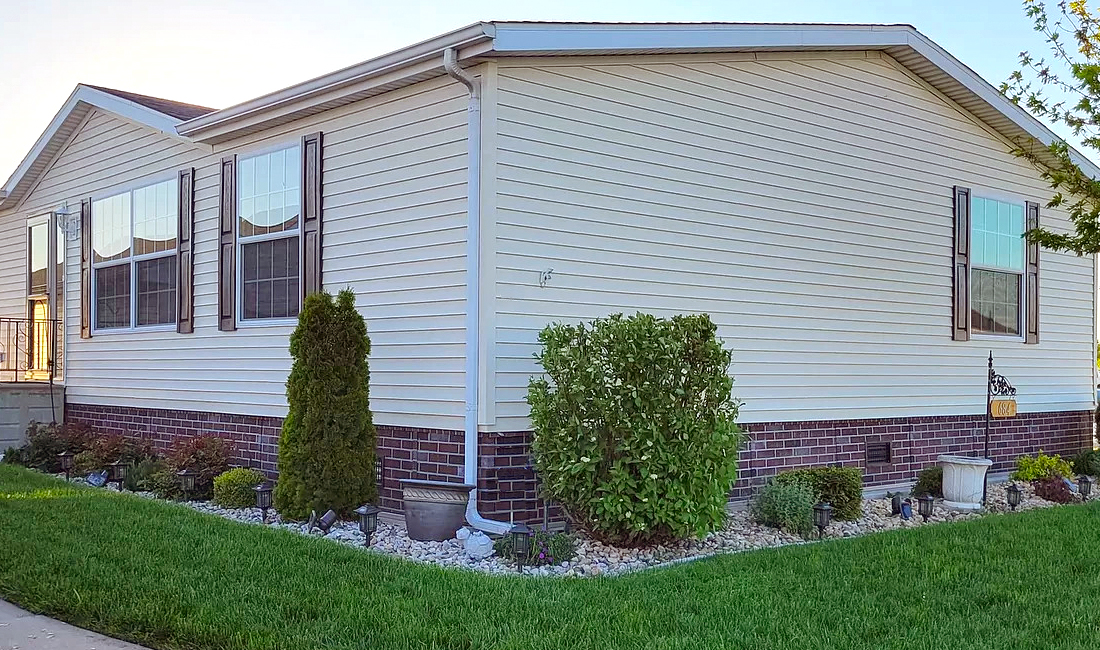
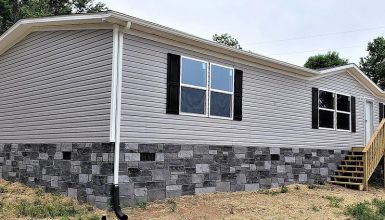
Brick skirting on a mobile home? Absolutely, you can do it! This smart upgrade not only boosts your home’s curb appeal but also adds a sturdy layer of protection. Consider it a win-win: your home looks great and stays safe from the elements. Plus, with the right tools and steps, it’s a project you can tackle over a weekend. Ready to get started? Let’s dive in!
Step 1 Preparation
Let’s prepare to give your mobile home a fantastic makeover with brick skirting! First things first, we need to do a bit of prep work.
Grab your tape measure, and let’s get to work. You’ll need to walk around your home and measure the whole perimeter. This is just like measuring for a new carpet, but outside! Write down these numbers because they’re key to knowing how many bricks you’ll need. Don’t forget to measure the height from the ground up to the bottom of your home. This tells you how tall your skirting needs to be.
Next up, it’s time to play a bit in the dirt! We need a clean and level space to work with. Take a good look around the base of your home and clear away any plants, rocks, or other stuff in the way. If the ground is a bit bumpy, no worries. Just grab a rake or a shovel to even it out. A flat surface is super important for our skirting to sit nicely and stay strong.
Step 2 Laying the Foundation
Now that our prep work is done, it’s time for the fascinating part – laying the foundation for your mobile home’s new brick skirt. Think of this as setting the stage for a grand performance. The foundation is key to keeping your skirting straight, sturdy, and looking sharp for years to come!
You have two main choices: a concrete foundation or concrete blocks. A concrete foundation is your best bet if you’re going for something super sturdy and long-lasting. It’s like giving your mobile home a strong pair of boots to stand in! But concrete blocks can do the trick if you want something a bit simpler and quicker. They’re like stepping stones that your bricks will sit on.
If you’ve picked a concrete foundation, you’ll need to mix and pour concrete around the perimeter of your home. This is like baking a cake but for your house! Make sure it’s smooth and level – a little extra care here makes a big difference. On the other hand, if you chose concrete blocks, place them evenly spaced around the edge of your home. Think of it like setting up checkers on a checkerboard.
Step 3 Framing the Area
Moving on to the next exciting step in our mobile home transformation – framing the area for our brick skirting. This is where we start to see our project take shape!
For our frame, we’re going to use treated lumber. Why treated lumber, you ask? Well, it’s like giving your frame a superhero cape. It stands up against moisture, rot, and little critters way better than regular wood. The unsung hero will keep the skirting, standing tall, and looking good.
Picture this: you’re building a big, sturdy picture frame that wraps around the base of your mobile home. Start by cutting your lumber to fit each side of your home. It’s a bit like building a custom frame for a unique piece of art – your home! Nail these pieces together to create a rectangular frame that sits snugly against the base of your mobile home.
This frame isn’t just for show; it’s the backbone of your skirting. It provides a solid structure for your bricks to lean on and stay in place. Once this frame is up, you’re ready to bring in the star of the show – the bricks!
Step 4 Brick Installation
First, let’s pick out our bricks. Imagine you’re choosing a new outfit for your home. You want bricks that look great and match your home’s style. And don’t forget the mortar – it’s like the glue that holds our brick outfit together. Go for a quality mortar mix to ensure your bricks stay put through all kinds of weather.
Next, laying bricks. Here’s where the magic happens. Start at one corner and lay your bricks along the frame. Think of it like laying down a path of stepping stones in a garden. Each brick should be snug against the next, with a layer of mortar in between. Use a level tool to make sure each brick is straight and even. It’s a bit like baking – you must get the measurements just right for the perfect finish.
Lastly is the mortar application. Mixing your mortar is like making a smoothie – you want the consistency just right. Not too runny, not too thick. Spread it on the bricks like you’re buttering toast, nice and even. Then, press each brick into place and wipe away any extra mortar that squishes out. It’s a bit messy, but oh, so satisfying!
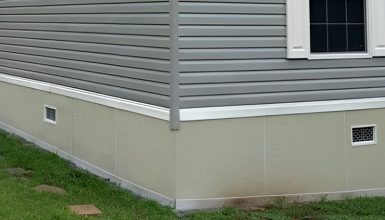
Step 5 Ventilation
Think of vents like little windows in your skirting. They let air flow in and out, keeping everything nice and dry underneath your home. Here’s how to do it: First, pick spots around your skirting to place these vents. A good rule of thumb is to have one vent for every 150 square feet of space under your home. Once you’ve marked these spots, it’s time to cut out small openings in your skirting. Then, fit in the vents. These vents come in all styles, so you can choose ones that match your new brick look.
Step 6 Finishing Touches
We’re on the home stretch now with our mobile home skirting project – it’s time for the finishing touches! This is like adding the icing on a cake or the cherry on top of a sundae.
Once all your bricks are in place, take a step back and have a good look. It’s like being a detective, searching for any little gaps or cracks between the bricks. These sneaky gaps can let in moisture or critters; we don’t want that. If you find any, just fill them in with some extra mortar. It’s like patching up a hole in your favorite jeans – a minor fix for a big improvement.
Now, for the final step – sealant. Think of this as a protective shield for your skirting. The sealant keeps out moisture and helps your bricks look new for longer. Choose a good quality sealant that’s meant for outdoor use. Applying it is easy – just brush it on like you’re painting a fence. Make sure to cover every nook and cranny. It’s like sunscreen for skirting, keeping it safe from the elements.


