
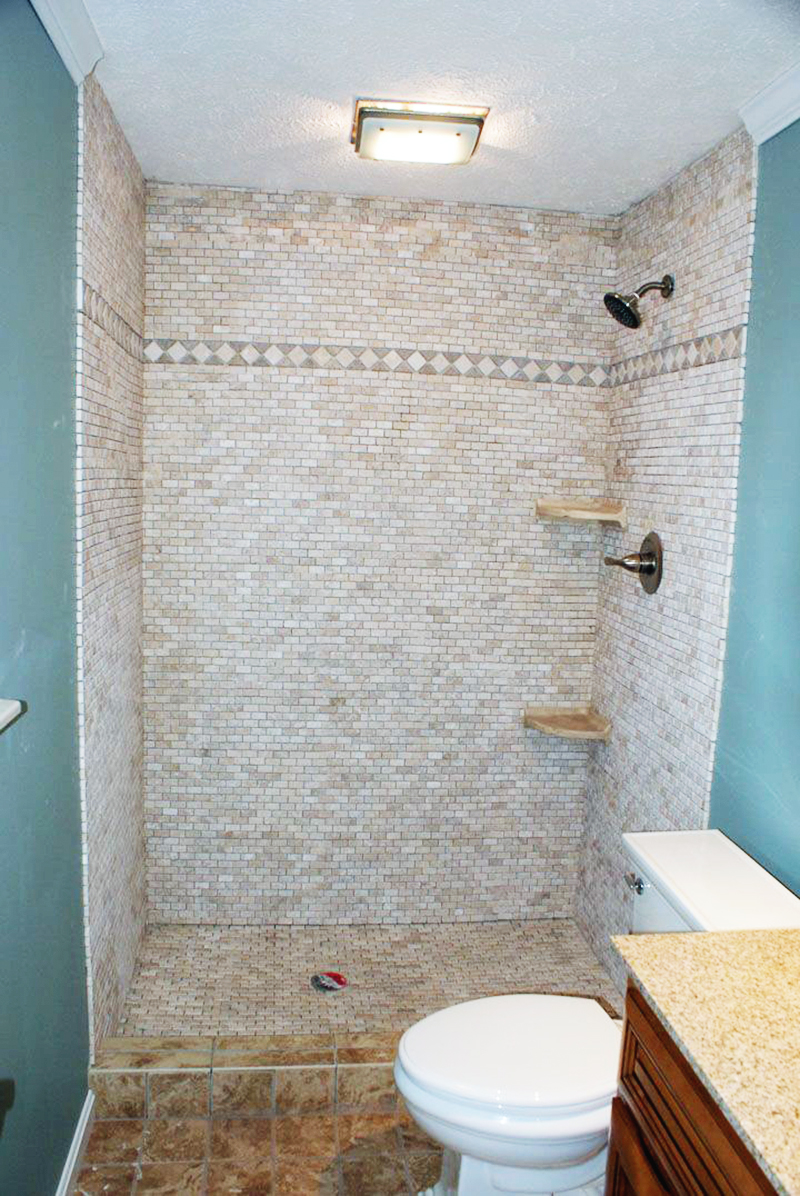
So, you’ve decided to give your mobile home’s shower a fresh look by replacing the old, outdated walls. Great choice! Replacing the shower walls is a great way to modernize your bathroom and add value to your home. Whether you’re looking to upgrade your mobile home for personal enjoyment or preparing to sell, this DIY project is a worthwhile investment. But where do you start? Don’t worry. We’ve got you covered!
Tools
Here’s a list of tools you’ll need to replace shower walls in a mobile home:
- Utility knife
- Pry bar
- Tape measure
- Saw (circular or reciprocating)
- Drill
- Level
- Screwdriver
- Caulk gun
- Silicone sealant
- Adhesive
- Safety glasses
- Dust mask
Before starting the project, gather all the necessary tools to avoid delays or interruptions. It’s also a good idea to wear protective gear like gloves and closed-toe shoes to prevent injuries while working.
Step-by-Step Guide Replacing Shower Walls
Here are the steps to replace shower walls in a mobile home:
Step A: Remove the existing shower walls
Removing the existing shower walls is the first step. Removing them carefully to avoid damaging the surrounding area or the mobile home’s structure. Here’s how to remove the existing shower walls:
- Start by locating the edge of the old walls. Look for any visible seams or edges where the walls meet the studs.
- Use a utility knife to cut through any caulking or adhesive holding the walls in place. Start at the top of the wall and work down, cutting through the caulking or sealant along the entire wall length.
- Once you have cut through the caulking or adhesive, use a pry bar to gently pry the wall away from the studs. Start at one corner of the wall and work along the length of the wall, prying the wall away from the studs as you go.
- Be careful not to damage the surrounding area or the studs while removing the walls. If the walls are stuck in place, use a utility knife to cut any additional caulking or adhesive holding them in place.
- Repeat this process for all of the walls you need to remove.
Step B: Check for any damage
After removing the old shower walls, it’s crucial to inspect the area around the shower for any signs of damage or wear and tear. Here’s how to check for any damage:
- Start by examining the studs that support the old walls. Check for any signs of water damage, such as soft spots, discoloration, or rot. If you find any damage, you must replace the affected studs. You can do this by cutting out the damaged section with a saw and replacing it with a new piece of wood the same size as the original.
- Next, check the shower pan for any cracks or signs of wear. If you find any damage, you must repair or replace the shower pan before installing the new walls. You can fix minor cracks with a sealant, but larger ones require replacement.
- Finally, check the surrounding area for any signs of mold growth. Mold can be a severe health hazard, so it’s essential to address it promptly. If you find any mold, thoroughly clean the area with a mold-killing solution and prevent it from returning, such as improving ventilation or fixing water leaks.
- Make sure to address any issues before installing the new walls. This will ensure the walls are installed on a solid and stable foundation, making for a safer and longer-lasting installation.
By checking for any damage before installing the new shower walls, you can ensure that the area is structurally sound and mold-free, making for a safer and healthier environment.
Step C: Measure the new shower walls
Measuring the new shower walls is crucial in replacing shower walls in a mobile home. Accurate measurements will ensure that the new walls fit correctly in the space and provide a tight seal to prevent water from leaking behind the walls. Here’s how to measure the new shower walls:
- Start by measuring the height and width of the space where the new walls will be installed. Use a tape measure from the top of the shower pan to the ceiling for the height and from one end of the shower to the other for the width.
- Measure the height of the shower pan. This measurement will be used to determine the height of the walls. Measure it from the top of the pan to the point where the walls will meet the ceiling or any other horizontal surface.
- When measuring the walls, consider any obstacles or irregularities, such as plumbing fixtures, electrical outlets, or uneven walls. You can measure around the obstacles or use a level to ensure the walls are straight and even.
- Double-check your measurements to ensure accuracy before cutting the new walls to size.
- If necessary, you can adjust the size of the walls using a saw or other cutting tool.
Step D: Cut the new shower walls
Cutting the new shower walls is critical in replacing shower walls in a mobile home. If the walls are not cut accurately, they may not fit properly or require excessive trimming, which can compromise the integrity of the installation. Here’s how to cut the new shower walls:
- First, transfer your measurements from the old walls to the new walls. Use a straight edge and a pencil to mark the cut lines on the new walls.
- Next, put on safety glasses and a dust mask. Cutting through the walls can generate a lot of dust and debris, so protecting your eyes and respiratory system is essential.
- Use a saw to cut the new shower walls to the correct size. A circular or reciprocating saw with a fine-toothed blade will work well. Ensure the blade is sharp and in good condition for clean and accurate cuts.
- When cutting the walls, make sure to follow your cut lines precisely. Use a steady hand and align the saw blade with the cut line to ensure straight and even cuts.
- If the walls have holes for plumbing fixtures or other accessories, use a hole saw or jigsaw to cut these holes.
- Once you have finished cutting the walls, use sandpaper or file to smooth out any rough edges or burrs left by the saw.
By following these steps, you can ensure that the new shower walls are cut accurately and fit appropriately in the space.
Step E: Install the new shower walls
Installing the new shower walls is critical in replacing shower walls in a mobile home. Proper installation will ensure that the walls are securely attached to the studs and provide a tight seal to prevent water from leaking behind them. Here’s how to install the new shower walls:
- Start by installing the back wall first. Apply adhesive to the back of the wall, covering the entire surface. Then, position the wall against the studs and press it firmly into place. Use a level to ensure it is straight and plumb.
- Next, install the side walls. Apply adhesive to the back of each wall and position them against the studs. Use a level to ensure that the walls are straight and plumb. Ensure the side walls overlap the back wall slightly to create a tight seal.
- Once the walls are in position, use screws to secure them to the studs. Screw the top and bottom of each stud, making sure to sink the screws flush with the wall’s surface.
- If the walls have any cutouts for plumbing fixtures or other accessories, install these now. Follow the manufacturer’s instructions for installing these fixtures, creating a tight seal to prevent water from leaking behind the walls.
- Once the walls and fixtures are in place, apply silicone sealant around the edges of the walls to create a tight seal. Use a caulking gun to apply the adhesive, filling gaps or cracks.
- Allow the adhesive and sealant to dry completely before using the shower. Depending on the manufacturer’s recommendations, this may take several hours or overnight.
By following these steps, you can successfully replace the shower walls in your mobile home. However, suppose you are not comfortable with any part of the process. In that case, hiring a professional to do the job for you is always best.

