
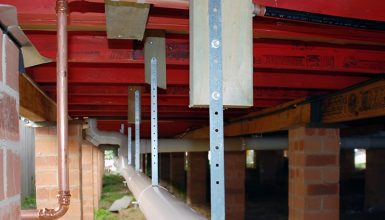
Water pipes are an essential component of any mobile home’s plumbing system. They carry fresh water into your home, allowing you to drink, bathe, and wash your dishes and clothes. Over time, however, these pipes can deteriorate, resulting in leaks, low water pressure, and even water damage.
Replacing old, damaged pipes in your mobile home is essential. Doing so can ensure your plumbing system functions correctly and avoid costly repairs. In this guide, we’ll look at the steps for replacing water pipes in a mobile home and some tips for getting the job done right.
Tools and Materials
Before replacing water pipes in your mobile home, gathering all the necessary tools and materials is essential. This will ensure you have everything you need to complete the job efficiently and safely.
Tools
The tools you’ll need may vary depending on the type of pipes you’re replacing, but some of the most common tools include:
- Pipe cutter or saw
- Adjustable wrenches
- Pliers
- Screwdriver
- A propane torch or soldering iron (if working with copper pipes)
- Pipe wrench
- Teflon tape
- Hacksaw
- Deburring tool
- Channel-lock pliers
Materials:
- New pipes (copper, PVC, or PEX)
- Fittings (elbows, tees, couplings, etc.)
- Connectors (compression fittings, soldering fittings, crimp fittings, etc.)
- Flux (if soldering copper pipes)
- Solder (if soldering copper pipes)
- Pipe thread compound (for threaded connections)
- Pipe hangers and supports
- Insulation (foam insulation or pipe wrap)
Note that the specific tools and materials you’ll need may vary depending on the type of pipes you’re replacing and the particular requirements of your project.
Step 1: Turn off the water supply
Before you start replacing water pipes in your mobile home, it’s essential to turn off the water supply to your home. This will prevent any water from flowing through the pipes and help ensure the job can be done safely and efficiently.
To turn off the water supply, you’ll need to locate the main shut-off valve for your mobile home. This valve is usually found near the water meter outside your home. If you’re unsure where your shut-off valve is located. You can check your mobile home’s documentation or ask a professional plumber for assistance.
Once you’ve located the shut-off valve, turn it off by turning the valve handle clockwise. This will shut off the water supply to your mobile home. Test the shut-off valve to ensure it works correctly and the water supply is completely shut off.
Step 2: Determine the type of pipes
It’s essential to determine the type of pipes you have before starting any work. This will help you choose the right tools and materials for the job and ensure that you make the appropriate repairs or replacements.
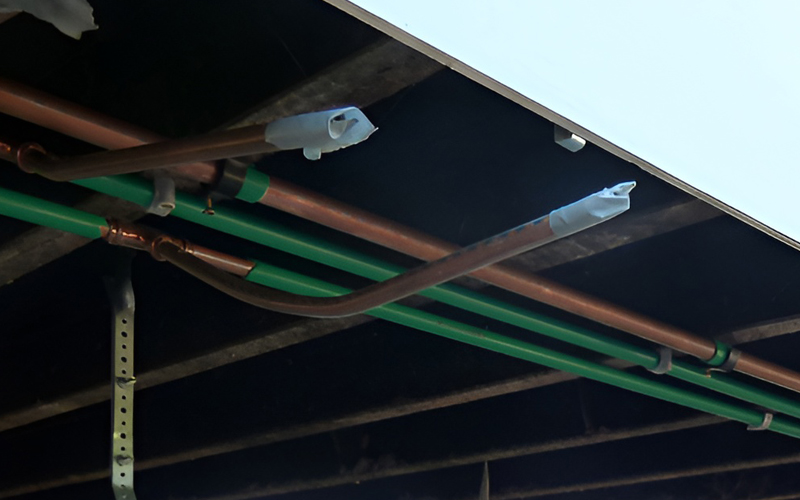
Mobile homes can have various pipes, including copper, PVC, and PEX. To determine the type of pipes you have, you can look for visual clues or find documentation identifying the variety of pipes used in your home.
Copper pipes are typically reddish-brown and can be identified by their distinctive soldered connections. PVC pipes, on the other hand, are white or gray and have a smooth, plastic-like texture. PEX pipes are typically blue, red, or white and have a more flexible, rubber-like surface.
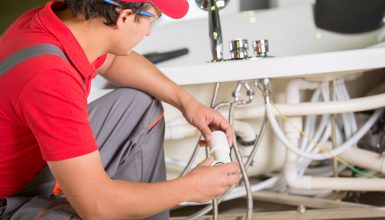
Step 3: Remove the old pipes
Once you’ve determined the type of pipes you have and gathered the necessary tools and materials, it’s time to start removing the old ones. This can be challenging and messy, but you can get the job done right with the right tools and patience.
To remove the old pipes, you’ll need to cut them using a pipe cutter or saw. Make sure to wear safety goggles and gloves to protect yourself from any debris or sharp edges.
Once the old pipes are cut, you’ll need to remove any fittings or connections that are attached to them. This can be done using pliers, an adjustable wrench, or a pipe wrench. Be careful not to damage any surrounding pipes or fittings during this process.
If you’re working with copper pipes, you may need a propane torch or soldering iron to remove the old ones. This requires more skill and expertise, so it’s best to consult a professional plumber if unsure how to do it.
As you remove the old pipes, keep the area clean and debris-free. This will make it easier to install the new ones and ensure that your plumbing system is working correctly.
Step 4:. Install new pipes
After you’ve removed the old pipes, it’s time to install the new pipes. This involves fitting the new ones together using the appropriate connectors and fittings.
First, measure the length of the new pipes you need and cut them to size using a pipe cutter or saw. Make sure to wear safety goggles and gloves to protect yourself from any debris or sharp edges.
Next, attach any fittings or connections needed for your specific plumbing system. This can be done using various connectors, including compression, soldering, and crimp fittings. Follow the manufacturer’s instructions for each connector type to ensure a proper fit.
If you’re working with copper pipes, you may need a propane torch or soldering iron to connect the new pipes.
Step 5: Test the new pipes
Once you’ve installed the new pipes, you must test them to ensure they’re functioning correctly and there are no leaks. This step is crucial to ensuring that your plumbing system works as it should. And that you won’t encounter any problems down the line.
To test the new pipes:
- Turn the water supply back on and run water through the pipes for a few minutes.
- Check each joint and connection for any signs of leaks or drips.
- If you notice any issues, immediately turn off the water supply and make the necessary repairs.
If everything looks good, let the water run for a few more minutes to ensure no hidden leaks or issues. You may also want to check your water pressure to make sure it’s at the appropriate level.
Step 6: Insulate the pipes
Insulating your water pipes is essential in protecting your plumbing system from damage and improving energy efficiency. Insulated pipes are less likely to freeze and burst in cold weather, and they can also help reduce heat loss and lower your energy bills.
To insulate your pipes, you’ll need to wrap them in insulation material, such as foam pipe insulation or fiberglass. This material can be purchased at most hardware or home improvement stores.
Before you begin insulating your pipes:
- Make sure that they are clean and dry.
- Measure the length of each pipe and cut the insulation material to the appropriate size.
- Wear gloves and long sleeves to protect yourself from debris or sharp edges.
Next, wrap the insulation material around each pipe, covering any fittings or connections. Use duct tape or cable ties to secure the insulation and seal any gaps or seams.
Suppose you have pipes in areas particularly prone to freezing, such as crawl spaces or attics. In that case, adding an extra insulation layer is essential for added protection.
Troubleshooting Tips
Even if you’ve taken all the necessary steps to replace your water pipes, you may still encounter issues or problems down the line. Here are some troubleshooting tips for identifying and fixing common issues:
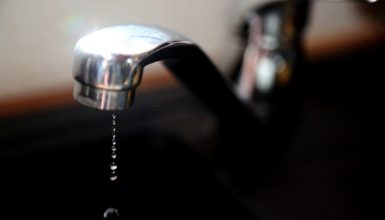
- Low water pressure
If you’re experiencing low water pressure, there may be a problem with your pipes or fittings. Check for any clogs or blockages in your pipes, and ensure all your fittings and connections are tight and secure.
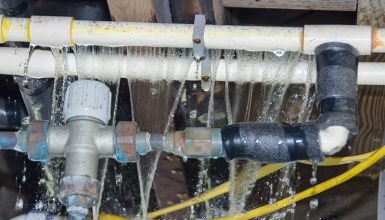
- Leaks
If you notice any leaks in your plumbing system, it’s important to address them immediately. Check all your fittings and connections for any signs of leaks, and make the necessary repairs.
- Noisy pipes
If your pipes make strange noises, such as banging or rattling, this could indicate a problem with your plumbing system. Check for loose or improperly secured pipes, and ensure all your fittings and connections are tight and secure.
- Rusty or discolored water
If your water is discolored or rusty, this could be a sign of rust or corrosion in your pipes. Check your pipes for any signs of rust or corrosion, and make the necessary repairs or replacements.
- Bad odors or tastes
If your water has a bad odor or taste, this could be a sign of a problem with your pipes or water supply. Check your pipes for any signs of corrosion or contamination, and consider installing a water filtration system if necessary.
Conclusion
Replacing water pipes in your mobile home can be challenging and time-consuming. Still, with the right tools and patience, it’s a job that can be done successfully. Whether you’re dealing with old or damaged pipes or want to improve the overall efficiency of your plumbing system, following these steps can help you get the job done right.