While a tripping circuit breaker is a good thing—it means it’s doing its job to keep you safe—it can also be super annoying and disrupt your daily life. But don’t sweat it; you’ve come to the right place. In this guide, we’ll break down the why, the what, and most importantly, the how to fix your tripping circuit breaker issue. So, let’s roll up those sleeves and dive in!
What Causes Circuit Breakers to Trip?
Before we bust out the toolbox, let’s get into the nitty-gritty of why circuit breakers trip in the first place. Knowing the “why” helps a ton when hunting down the solution. So here are the usual suspects:
1. Overloaded Circuit
This one’s the most common culprit. Ever run the microwave, hairdryer, and air conditioner all at the same time? That’s an overload waiting to happen. Your circuit is like a highway, and too many cars cause a traffic jam.
2. Short Circuit
Picture this: your hot wire (that’s the black one) and the neutral wire (the white one) decide to have a little meet-and-greet. This is terrible news because it creates a direct path for electricity, causing too much current flow. It’s like a water slide that’s too steep—super fun but dangerous!
3. Ground Fault
This is basically a more specific type of short circuit. It happens when the hot wire touches a ground wire or another grounded part of your system. Imagine dropping an electrical appliance into a sink full of water. Scary, right? That’s a ground fault.
4. Old or Damaged Breakers
Yep, like anything else, circuit breakers get old and cranky. If your breaker’s been around since disco was king, it might be time for a replacement.
Now, each issue has its fixes, from easy-peasy to “Whoa, I need a professional for this!” But don’t worry; we will walk through all of them step-by-step.
Identifying the Problem
Now it’s time to play detective. We’re trying to identify what’s causing that pesky circuit breaker to keep tripping. So grab your magnifying glass (or, you know, just your reading glasses), and let’s dive in.
Step 1: Inspect the Tripped Breaker
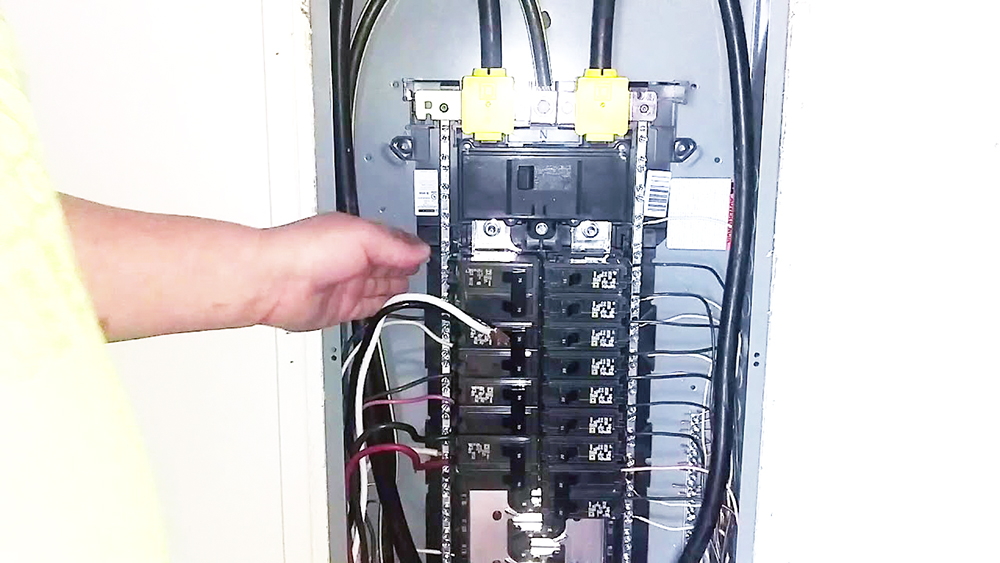
The first stop is your electrical panel. You’ll want to locate the breaker doing the whole on-again, off-again dance. It’ll be the switch in the “off” position or maybe stuck somewhere in the middle. Think of it as the sore thumb of your electrical panel—it’ll stick out!
Step 2: Unplug Devices
Alright, now you know which breaker is causing the drama. Head to the area of your home that’s lost power and unplug everything. Yes, everything. We’re clearing the stage to isolate the problem. Imagine you’re troubleshooting your Wi-Fi by turning off all connected devices; it’s the same concept here.
Step 3: Reset the Breaker
Back to the panel, we go! Flip the troubled breaker to the “off” position, take a deep breath, and then switch it back to “on.” Suppose it stays on, congrats! But hold the applause—we’ve still got work to do. If it trips again immediately, you’ve got a more severe issue on your hands. Either way, you’ve just taken the first step toward a solution.
Diagnostic Checks
Alright, Sherlock, you’ve gathered the clues. Now it’s time for the juicy part—solving the mystery! We’re diving deep into diagnostic checks to determine which culprit makes your circuit breaker act like a drama queen. So, let’s roll:
Step 1: Check for Overloaded Circuit
First up, the infamous overloaded circuit. If you’ve unplugged everything and the breaker still trips, overloading is likely not the issue. But if it stays on, start plugging your devices back in one at a time. If it trips as you add more gadgets, you’ve found your bad guy. The fix? Spread out your electrical needs; don’t make one circuit do all the heavy lifting.
Step 2: Inspect for Short Circuit
Remember, a short circuit is when the hot and neutral wires get too cozy. You’ll usually smell something funky or see a black or brown mark near the outlet. If that’s the case, turn off the power, unscrew the cover, and check the wiring. Loose wires or frayed insulation are usually to blame. Tighten things up or replace the wiring if needed. But hey, if you’re not comfortable doing this, call in a pro. Some battles are best left to the experts.
Step 3: Look for Ground Fault Issues
Ground faults are like short circuits’ big brothers—they’re worse. Usually found in wet areas like kitchens or bathrooms, they can be pretty dangerous. If you suspect a ground fault, you’ll see a GFCI outlet with a “test” and “reset” button. Press the “reset” button and see if that fixes the issue. If it doesn’t, you know what to do—call a professional. No DIY is worth risking your safety.
Step 4: Examine the Breaker Itself
Last but not least, let’s not forget the breaker could just be old or faulty. If you’ve gone through all these steps and still can’t find the issue, it might be time to replace the breaker. Again, if you’re not 100% sure about doing this yourself, hire a qualified electrician.
When to Call a Professional
Sometimes, a DIY spirit and a can-do attitude just aren’t enough. Even the best of us need to know when to throw in the towel and call for backup. Here’s when you should put down the screwdriver and pick up the phone:
Sign #1: Immediate Tripping
If that breaker flips back off the second you reset it, don’t play games. Immediate tripping often means a severe issue, like a short circuit or ground fault. It’s a clear signal from your home saying, “Hey, I need a pro here, stat!”
Sign #2: Smoke or Burn Marks
If you see smoke, smell something burning, or notice char marks around an outlet—stop right there. We’re in danger zone territory, and it’s time to call a certified electrician ASAP. You don’t want to mess around with potential fire hazards.
Sign #3: You’re Out of Your Depth
Be honest with yourself. If you’re feeling overwhelmed, confused, or just not super confident, it’s better to seek expert help. Electrical work isn’t a great place for learning on the job, and there’s zero shame in calling in the experts.
Sign #4: Consistent Issues
Maybe the breaker doesn’t trip immediately, but if it keeps happening repeatedly—despite your best DIY efforts—it’s time for professional intervention. It could be a more significant, complex issue you’re not equipped to handle.
Sign #5: Outdated Electrical Panel
If your panel is older than your favorite pair of jeans, that could be a sign it’s time for an upgrade. Old panels are not just inefficient; they can also be unsafe. You’ll want a certified electrician for that job. Trust me, your home and peace of mind will thank you.
Preventive Measures
By taking these preventive steps, you’re not just dodging potential issues but laying the groundwork for a safer, more efficient home. It’s like putting on sunscreen before hitting the beach—you might not see the benefits immediately. Still, in the future, you will be grateful.
Step 1: Balance the Load
Picture this: you wouldn’t put all your groceries in one bag and risk it breaking, right? The same goes for your electrical circuits. Spread out high-powered devices across multiple circuits. Your breaker will thank you.
Step 2: Regular Check-ups
Just like you go to the doctor for an annual check-up, your electrical system needs a little TLC, too. A yearly inspection by a qualified electrician can catch problems before they start tripping your breakers like crazy.
Step 3: Upgrade Old Systems
Consider an upgrade if your electrical panel is so old it belongs in a museum. Newer panels have better safety features and can handle modern electrical demands like smart home gadgets and high-powered appliances.
Step 4: Install Surge Protectors
You’ve got surge protectors on your pricey electronics, but what about your electrical system? Whole-house surge protectors can be installed directly into your electrical panel. They act like bouncers, keeping those unruly power surges from crashing the party.
Step 5: Get to Know Your Breakers
Sounds silly, but take a minute to label your breaker switches. Knowing which switch controls what can be a lifesaver in an emergency. Plus, it helps you quickly identify which circuit might be overloaded or problematic.


